Sunday, February 2, 2014

Simplicity 8399 - AKA The great fitting time-suck


Behold, my newest sewing diversion from previous sewing diversions...


Last weekend I embarked on a muslin of this (apparently) simple blouse pattern, Simplicity 8399 from 1969 - not to be confused with Simplicity 8399 circa Kate and Leo...


Not that those dresses aren't lovely - it's just that they just don't fit well in my current career wardrobe. Actually, my current career wardrobe is almost non-existent, hence the sudden desire to sew a blouse. Unfortunately, Simplicity 8399 has been nothing short of a pain in the tuckus so far, and I'm blaming part of it on poor drafting.

First, there are the issues with the self-facing. The shirt front has a fold line to create the facing, but I am fully convinced it was placed in the wrong location. Here is the pattern piece:


The black line indicates the center front as marked on the original pattern. I'm assuming this is the center front anyway, since that's where the buttonholes are marked (which I attempted to demonstrate with my crooked little dashes). The fold line on the original pattern is marked in blue. When I followed these markings, however, I had trouble getting the blouse to overlap properly in front. So I re-examined the pattern and saw that the fold line is actually positioned at the real center front, right at the center of the neckline curve. You can see this a little better in this photo:


So I had to move the fold line for the facing over by 3/4", or else there wasn't enough fabric for an overlap to form a placket. Once I did, everything lined up much better. I also had to adjust the curve on the neckline edge of the self-facing, to compensate for this change.


The next problem I encountered was easing the sleeve in. I measured, and the sleeve cap is 2" longer than the armhole measurement, which falls on the upper end of suggested ease, according to the venerable authorities at Sewing.PatternReview. So that will need to be shaved down. Even so, the sleeve is not a good fit on me. It fits fine with my arms at my sides...


But when I lift my arms, I feel quite restricted, especially reaching toward the front...


Here is how it looks from the back...


Pardon the photo overload, but I wanted to show how the strain lines on the back dramatically increase as I move my arm forward. I know some wrinkling is natural, but this seems over the top and feels very uncomfortable. I'm sure if I made this up in the delicate voile I have in mind, it would tear in no time. So what's the issue? I can think of a couple things. First, I need a little more ease across the upper back. You can see in these photos that I removed about 2" of the width from the front and back by putting in princess seams (1" removed at each). I won't keep those as princess seams in the final garment - I'll just slash and overlap the pattern pieces like you normally do when you grade a pattern. The pattern is for a 38" bust, and I am closer to 36" so this adjustment seems logical enough. But I might have been over-zealous in removing a whole 2", and I might need to add some of that back in to make the upper back fit better. This will help a little with the strain I feel when moving my arms forward. But I still think some of the problem is in the sleeve itself. The armhole isn't too low - I've encountered that enough times to recognize it. It's as though the width across the upper sleeve is too narrow. Or maybe the sleeve is sewn on at too steep an angle? At any rate, I'm waffling between starting over with a different blouse pattern, or sticking it out and finding a way to make this work. What would you do?

Saturday, January 18, 2014

Sewing Duffel Bags, Harvesting Hardware, and Claire V. Samsonite

I have a little problem with blogging ADHD. If you're a loyal reader, you must be very patient with the way I skip around from one project to the next and leave half of them unfinished. I apologize for the inconsistency - maybe this year I should work on my follow-through. Here's a couple things I owe you a post on:
  • The results of my Kaffe Fasset dress! (cute but with some serious fitting issues despite muslining - I see seam ripping in my future)
  • What became of Josh's shirt! (It's finished! He wears it! I'm gonna make another one! Eventually...)
  • Photos of the finished wedding dress! (Are we even interested in this anymore? I only just got a hold of the official photos)
Now that I got that off my chest, I'm going to blog about something new! Whoops. Actually, it's new-old. I have to give you a belated Christmas sewing report because I want to tell you about my adventures sewing duffel bags. So if you're so over Christmas...


...and you're not interested in sewing bags, perhaps you wanna sit this one out.

I managed to sneak in sewing time and even made some last-minute Christmas gifts. I'm quite proud of this for two reasons. First, I was totally scrambling to get everything together for Christmas this year. There's never enough time, but somehow there was time to make a few gifts. And second, I somehow managed to resist fabric shopping for myself whilst out buying fabric to make others' gifts, even though everything was on super Christmas sale and even though I found many fabrics that would make a fantastic holiday dresses. [I guess you know from my silver dress that I did cave, eventually. But not til after Christmas!]

So what did I make? An apron for my sister - more plain, practical, and durable than the last one. (Katie! Send pics!) Second, a duffel bag for my brother-in-law:


With the release of two beautiful bag patterns this season - Cooper from Colette Patterns and the Portside Travel Set from Grainline Studios - I suddenly had the itch to sew luggage, if not the spare cash to buy patterns.

Colette Patterns Cooper bag

Grainline Studioes Portside Travel Set
So, using the power of geometry and some trial and error, I drafted my own pattern for a duffel bag.

[I finally had to look it up - duffel can be spelled "duffel" or "duffle" and the word comes from a town near Antwerp. Or at least so says dictionary.com.]

I used leftover wool from my Minoru coat, duck cloth from Joann's, and hardware that I scrounged from a Goodwill bag. Pro tip - it is much cheaper to buy a piece of luggage at the second-hand store and harvest it for the hardware than to buy all those pieces new. Plus, you find interesting looking options that Joann's doesn't stock. I particularly like the antique-y looking brass of this set I found.


The bag has a zippered pocket on one end and pockets on the sides.


The shoulder pad thingy was also scrounged from the Goodwill bag. I also lined the duffel with rip stop nylon (also from Joann's). The bottom of the lining is made out of the duck cloth though, for extra durability.


There's also an interior pocket.


I think the lining makes it look very polished. I tried inserting it by machine, but that didn't work so hot. It was very hard to work around the bulky wool of the outer fabric. I ended up ripping out all my machine stitches and sewing the lining in by hand. Also, I'm not sure there's an easy way to insert a lining when you're working with a lapped zipper. Anyone know?

I'm very proud of my sewing machine for powering through all those thick layers of a fabric. She was a real trooper. I was also surprised that sewing this bag wasn't as boring as I expected. It was actually pretty enjoyable. I didn't have to mess around with fitting. I liked the drafting process. I liked sewing a bunch of straight lines - it made me feel fast, efficient, powerful! And I like that the outcome is such a useful object. Hopefully it holds up to lots of wear and tear.

I already have more bags planned. In fact, I'm in the process of making one for my brother's Christmas gift. Yes, it will be a late gift. A very late gift. Actually, I was aiming to make it in time for his birthday, but I'm afraid I'm going to miss that mark as well, and I'll tell you why. It's because I harvested the hardware from a Samsonite bag, and Samsonite bags are apparently built to never come apart, ever.


The D rings are fastened to the bag with strips of metal, and removing them was a battle waged over several days. I attacked, retreated, attacked with a new tool, retreated again, etc. I was too lazy to go buy the proper tool to hack through metal, but I am extremely stubborn, and I did win in the end.


All in all, the bag yielded up three zippers, a couple of lobster claw clasp thingies, some D rings, and a metal slide for the strap. The bag was $2.50. A single zipper can cost more than $5 at Joann's.


But was it worth the energy to extract all that hardware? Considering the triumph I felt overcoming a laptop bag, I'll say yes.


As for the irony of destroying one perfectly good bag in order to create another? Well, I haven't sorted out how I feel about that yet : )

Saturday, January 4, 2014

Sewing for Josh... sigh.

I know 2013 is officially over, but for some reason I've gotten the urge to cross off another item from last year's resolutions: sewing something for Josh.

"...An excellent idea. Why are you only doing this now?"
I'll admit, I've gone way too long without trying to make him something. Trouble is, last time I tried there were many fitting woes that I didn't know how to handle. Also, Josh doesn't really like to hold still.

This makes fitting difficult. Also, sewing shirts is difficult and fiddly. Isn't it?

But I'm giving it a go with McCalls 6044.
I spent a long time measuring one of his dress shirts, writing everything down, and comparing those measurements to the pattern pieces. Unfortunately, there were a lot of things that weren't quite right with the comparison shirt, even though it's one of his favorites. Too tight in the neck is the big one. After spending a long time measuring, I ended up going with a straight size Medium. The only change I made was to fold a little length out of the sleeve - which seemed weird, because he often comments on how long his arms are. But according to the comparison shirt, that's what I was supposed to do, so I did it. It all seemed like it was going to work...


Boo. It's not awful, but there are some issues, and they're pretty much exactly what I already knew about trying to fit Josh. The neck is too small, and the sleeves are too short. Can I fix it?


Mmmmaybe? For the neck, I'm consulting a tutorial that Tasia did for this issue. It has stuck in my head over the years. I looked it up, and sure enough - true to Tasia style it is extremely clear and well documented. So we'll see if that helps.

For the sleeve length - I can make slightly longer cuffs and use shorter seam allowances. He'll probably roll the sleeves anyway. There's one thing I can't fix, however - the arms cythe is too low.


The whole shirt raises up when he lifts his arms, and I know from my previous adventures with my tailored jacket just what a problem that can be...


What kills me is that I suspected this would be an issue, and then I forgot to do anything about it when I cut the fabric. Note to self: You can always lower an arm scythe. You cannot raise it up. Sigh. This shirt was intended to be a wearable muslin, so I guess I'm not too upset. The fabric was cheap - a flannel I bought last year on super clearance. Still, I was really putting my all into it, finishing it nicely and everything. I even learned to make tower plackets! On the bright side, I found I don't hate sewing a man's shirt. It's actually kinda fun. But fitting Josh? Now I gotta go see if I can get him to stand still again...

Thursday, January 2, 2014

Silver Dress for New Years

Happy 2014 everybody! I hope 2013 wrapped up nicely for everyone - it sure did for me! Although my friends and I opted for board games and menudo over crazy parties on New Years, I am very satisfied with the way we rang in 2014. I also managed to finish my silvery dress in time to submit it to the SewingPatternReview Cocktail Outfit Contest!


Woohoo! How's that for some last minute resolution fulfillment? To be honest, I don't really give a hoot about resolutions. Well, that's not true. I like to make them, I just won't get on board that whole guilt train that goes around for all of us who don't live up to our own high standards. No thanks! But it was a (mostly) fun challenge trying to eke this out at the end of the year, allowing me to check off one of my resolutions that had been neglected.

I managed to finish up the dress about 6 pm on New Years Eve, and Josh and I snapped some quick photos before heading out the door to our friends' place. I took a few more today, outside in the new snow we're getting.


With mah boots on, cuz I'm not that crazy.


I'm not sure what I think about the skirt. I really like the way the pleats look, but they bunch up all funny when I sit down. Maybe it's the fabric I chose. It's a cotton/linen/polyester/mystery blend, and it might be a little stiff for this pattern. Or, maybe that's just the way pleated skirts go. I like the way it looks when I'm standing up at least.


I finally figured out how to successfully put in an invisible zipper using my sewing machine. Usually I hand sew my zippers. Something about the needle position on my machine in combo with the invisible zipper foot meant that I was always stitching across the zipper teeth on accident. Maybe that foot was never intended to be used with my machine? Who knows. I switched to a different foot, and it magically worked. Hooray!


I underlined the bodice in handkerchief linen leftover from my sister's wedding dress, but I wish I had just lined it instead. All the exposed seams of the sparkly fabric are itchy. I tried to do bias-bound armholes, but that was a disaster (I always pull the binding too tight), and I had to unpick them.


So I made some facings, instead.


For the neckline, I tried out a method from Lynda Maynard's Dressmaker's Handbook of Couture Sewing Techniques. My brother-in-law gave me a copy for Christmas (thanks Ian!) which relieved me of having to constantly borrow it from the library. Apparently, Lynda also has Craftsy course on her finishing techniques. Neato. I might grab that if there's ever a sale. This is the banded neckline from Lynda's book:

image from Lynda Maynard's Craftsy course
And here's mine:


My bands are a lot narrower, and I didn't topstitch. I think it worked out alright. I did a sample first, to make sure I was understanding the directions. Here's what it looks like on the inside.


I wasn't a huge fan of all the serged edges, so on the final version I made bias tubes instead and slip stitched them down.


The trim on the hem is some ribbon from my stash. I think I picked it up at an antique mall a while back.


Not much else to report, but if you're interested in all the fitting modifications you can read my review on SewingPatternReview.


Happy New Year everybody!

Monday, December 30, 2013

Year End Reflection and a Last Minute Dress

2013 is drawing to a close, and I've been reading everyone's "Top 5 Hits and Misses" around the sewing blog-o-sphere. These posts can be fun, but they also give me a tinge of guilt. Should we look back at my New Year's Re-sew-olutions from January?


1. Finish sewing my jeans - Ha! Haven't touched this one since 2012, but I don't really care. I bought Kenneth King's Craftsy course on copying your jeans, and I have a feeling I started out all wrong on these anyway. Maybe I'll work on this in the New Year, maybe not.


2. Make some Sewaholic Thurlows and a Minoru - I can happily say I finished my Minoru, and I've been wearing it all winter.


The construction may not be perfect, but this project taught me that it doesn't always matter. I get a lot of wear out of this baby, I get a lot of compliments, and no one notices the imperfections.

3. Participate in a sewing contest on Sewing.PatternReview - Guys! I'm so close to this one! After I got some selfless Christmas sewing done, I decided to try to squeeze in a project for myself before the New Year. SewingPatternReview is having a cocktail dress contest, and I've been working diligently for the past three days so that I will have something sparkly to submit. Wanna see?


It's McCalls 6433, a pattern which has been in my stash for quite some time.
I had actually set this pattern aside many months ago, thinking I didn't like the style anymore and I'd give it away. Then I saw a bunch of very cute versions...

Sew Busy Lizzy's little red number
a lovely version in emerald green by the Seamstress from Venus
awesome fall version by the Modern Mantua Maker
...and they inspired me to give it a go. The fabric came from Joann's. It's an interesting blend which is mostly cotton and linen and trace amounts of polyester and something listed only as "other." I'm going to guess the "other" mystery fabric is the bits of silvery tinsel that give the fabric its sparkle. The sparkle doesn't show up too well in these photos, but trust me, it's there.


As much as I like to scoff at Joann's, it seems as though my local one is carrying more apparel fabric these days. This is one of the fabrics that grabbed my eye when I was shopping for Christmas gift fabric for others. I held off til after Christmas, but then I couldn't resist any longer. I guess it was meant to be, because as the lady was printing out my ticket she told me it was actually a clearance fabric (cha ching!) and it was half-off on top of that. Sooo $3.50/yard. Not bad, eh? Let's just hope I can get this together by tomorrow in time to submit it for the contest!

Okay, back to the resolutions...

4. Sew something for Josh - No comment. Okay, fine. I actually went and bought McCalls 6044 for him, a pattern that a commenter kindly recommended to me at the beginning of the year. So baby steps. Maybe I'll get there sometime in 2014.

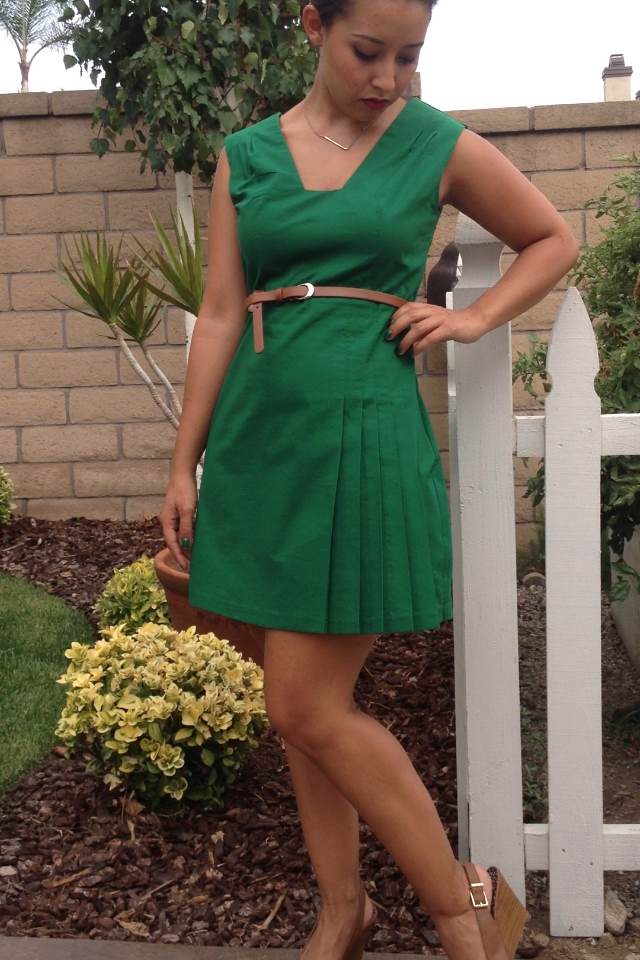
5. Sew something in green - Specifically, emerald green, which is Pantone's Color of the Year for 2013. I sewed a sleeveless blouse that was shades of green...


Hmm. Well maybe I'll carry that resolution over for the new year. I'm not too keen on the new Pantone selection for 2014 anyway.


Radiant Orchid - maybe it'll grow on me. Who knows.

6. Do some giveaways - Pretty sure I did that at least once. Once is good. Okay, maybe I could do a few more in the future. Especially as I've been pretty lucky in the giveaway department myself lately.

7. Blog more - I posted 24 times in 2012, and 30 times (this makes 31!) in 2013. I'll count that a success. But I also have a lot of drafts of posts which I oughta finish up and publish. For instance - professional photos of the wedding dress, things I sewed for Christmas gifts, etc. But all that has to wait while I go finish up that cocktail dress. Wish me luck! Hopefully I'll be able to cross off one more resolution for 2013!


Thursday, December 5, 2013

Do you heart Kaffe?

After Josh's comments about my Kaffe Fasset striped dress, I started searching around for other people who have used his fabrics for clothing (and not just for quilts). Well lookeee what I found:


A rainbowy striped Cambie Kaffe by Rosie on Kollabora. Isn't it cute! Like stripey candy. And then there's...


A cabbage Kaffe dress by Jorth. Maybe it's her fantastic smile that's selling it, but I'm pretty sure the dress is also awesome. And next...


Another Kaffe sundress by Rosie again! Lovely. But there's more...


A Kaffe tunic in toned down hues, by one Nicole on Kollabora. I'm liking both her tunic and her canoe. And finally...


..this adorable little girl over at youandmie.com.

How do you feel about Kaffe Fasset fabrics? Should they stay in the realm of quilting and children's cloths? Are they not for the faint of heart? I have mixed feelings about his designs. Like Amy Butler's, Anna Maria Horner's prints, I think think they are beautiful, but sometimes I also think they scream "I LOVE TO CRAFT!!!!" when maybe that's not always the message I want to send. What do you think?