
**WARNING/DISCLAIMER - I am not a professional, and I don't really know what I'm doing! So if you're looking for instructions on how to clean a vintage sewing machine, maybe check out Peter's links here. If you're just amused at the antics of an amateur with a bunch of screw drivers and a Singer 66, read on.**
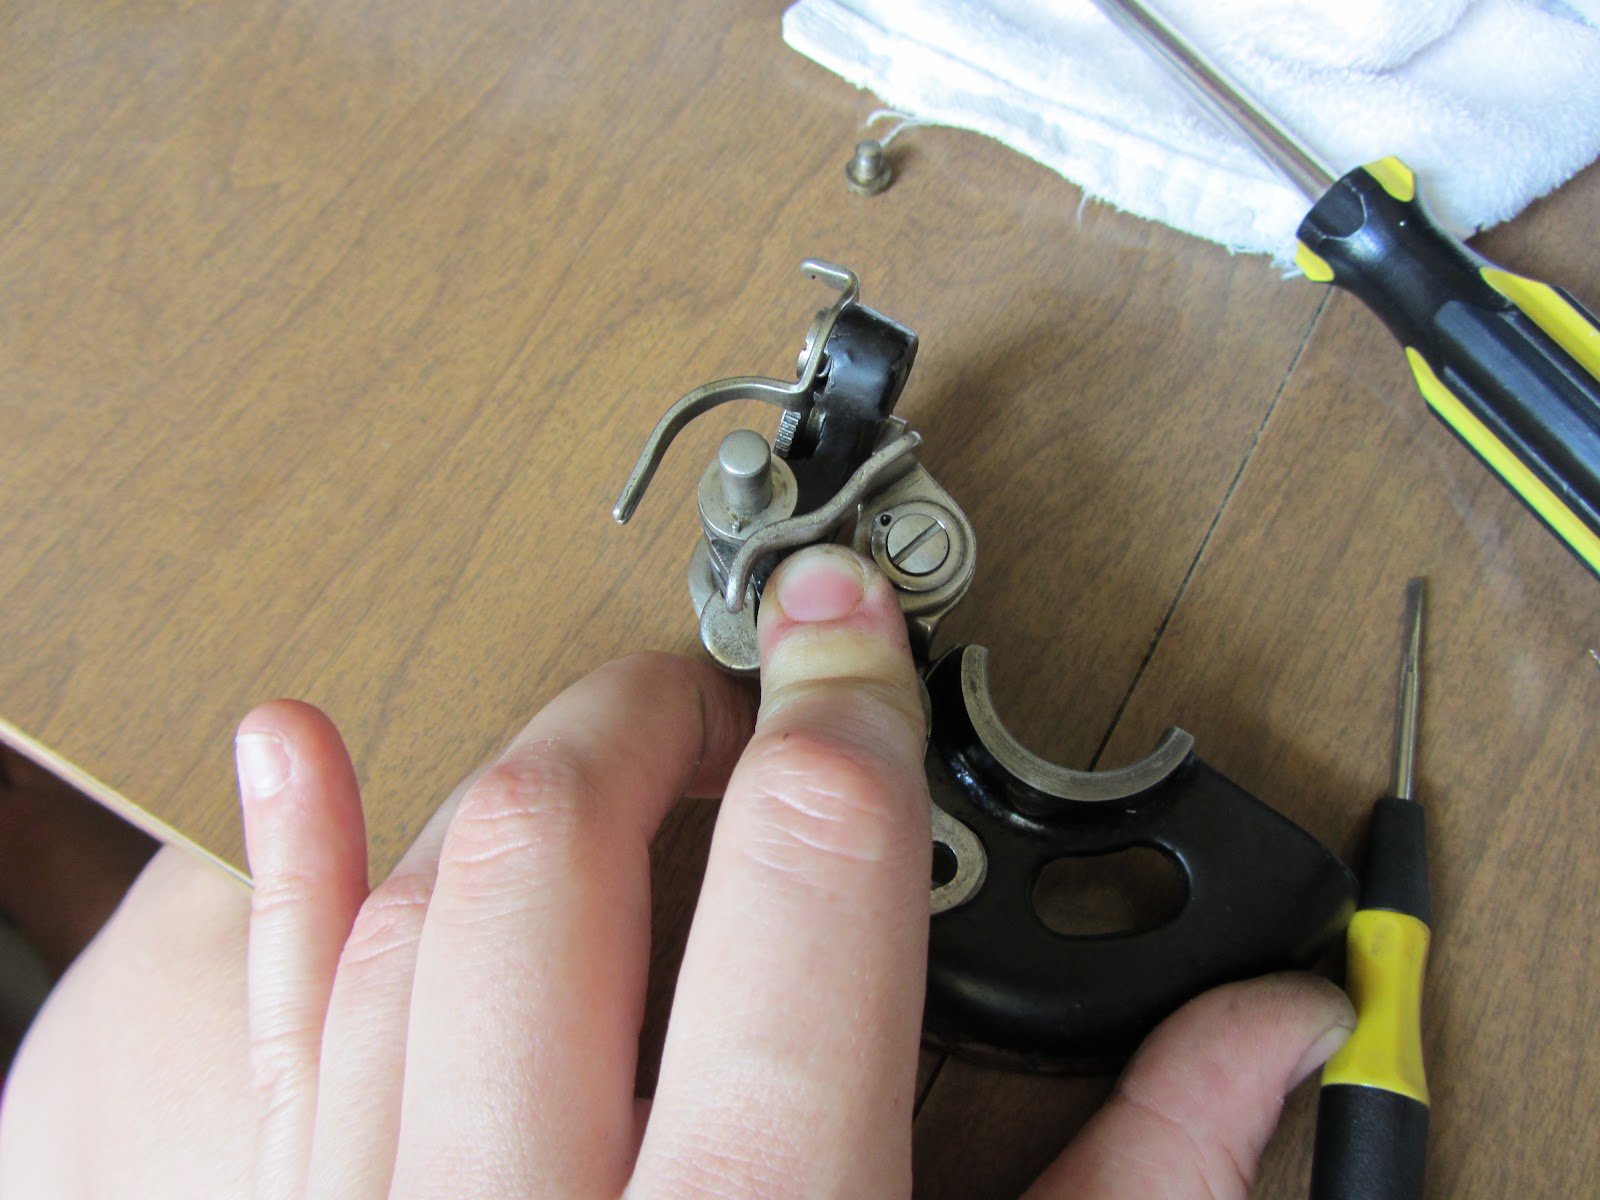
Alright, last time I showed you how I put all the bottom stuff back together. Today I'll tackle the bobbin winder and associated bits and pieces. In other words, this stuff:

Starting with this piece...

We need a spring to fit into the left hole there. There are three springs that go into this whole contraption:

For this part I want that smallest one on the right. It's the only one that fits - that's how I know. So fit it into that hole as shown below. You can see that the little bend in the spring fits into one of three small holes. I think I have it positioned here in the one at the bottom (or furthest left, however you want to view it).

Next take the part shown below (I'll call it an arm) with its associated screw and fit them over the spring.

You can see that the small hole in the arm fits over the other bend in the spring (arrow below).

And once in place, the spring allows you to move the arm back and forth...

Now we need this disc piece (below) and its screw. It's going to fit over the other hole, and that little notch at the top is going to line up with the notch on the black thingy (bobbin winder). The side facing up on the disc is going to face down on the bobbin winder.

Oops, forgot there's this little washer that goes between the disc and bobbin winder (below).

The concave side faces the disc:

Now we can put it on the bobbin winder, put the screw through...

And here's the opposite side below. The square nut fits over the end of the screw to hold everything in place:


Next, rotate the bobbin winder so you are looking at this side, and take the largest spring and this screw:

The short tail of the spring will go through the itty bitty hole in the photo below, and the screw pokes through from the other side:
 |
| screw is in place |
 |
| spring is in place |

In the photo below you can see the tail of the spring poking out, but it is on the wrong side. It should be pushed over to the other side of the metal piece where the pink arrow is pointing.

Here it is put together incorrectly. You can just see the tail of the spring poking out.

And here it is put together correctly:

Okay, now we flip everything over and grab the last spring (medium sized one).

It fits into the circular grove as shown below, with one of the tails fitting into the tiny hole on the right. At the moment I have no idea whether or not I've been choosing the correct tiny holes and what difference it might make. So if you're following my lead you might want to wait til I publish the rest of these walk-thrus to find out if my machine actually sews correctly in the end.

Now the metal arm shown below will fit over the top of the spring and the screw below will hold it in place. Sound easy? I think this was the hardest part of putting my machine back together.

Again, the tiny hole in this piece fits over the other tail of the spring. It also needs to twist around, once again keeping tension on the spring.
You can see below that I did this incorrectly at first. I twisted the spring the wrong way, loosening it rather than tightening it, and it expanded too large for that circular groove. You can see where it popped out below (pink arrow).

Here's the view from the other side. Definitely not right.

Unfortunately, I found it much more difficult to bend the spring the correct way. In the end I took two pairs of pliers, grasped both tails of the spring, and twisted it into a tighter coil. This made things a little easier.
When this piece is in its proper place, the metal arm hooks around a little black bump on the bobbin winder, shown below where the arrow is pointing. Also, check out my awesome before and after comparison! Taking all those photos as I took everything apart has really helped for the reassembly process. If I can offer any advice, it's to take lots of pictures and at lots of different angles when you are doing a job like this.

Now we can mount the whole thing back on the sewing machine. Here's where it goes:


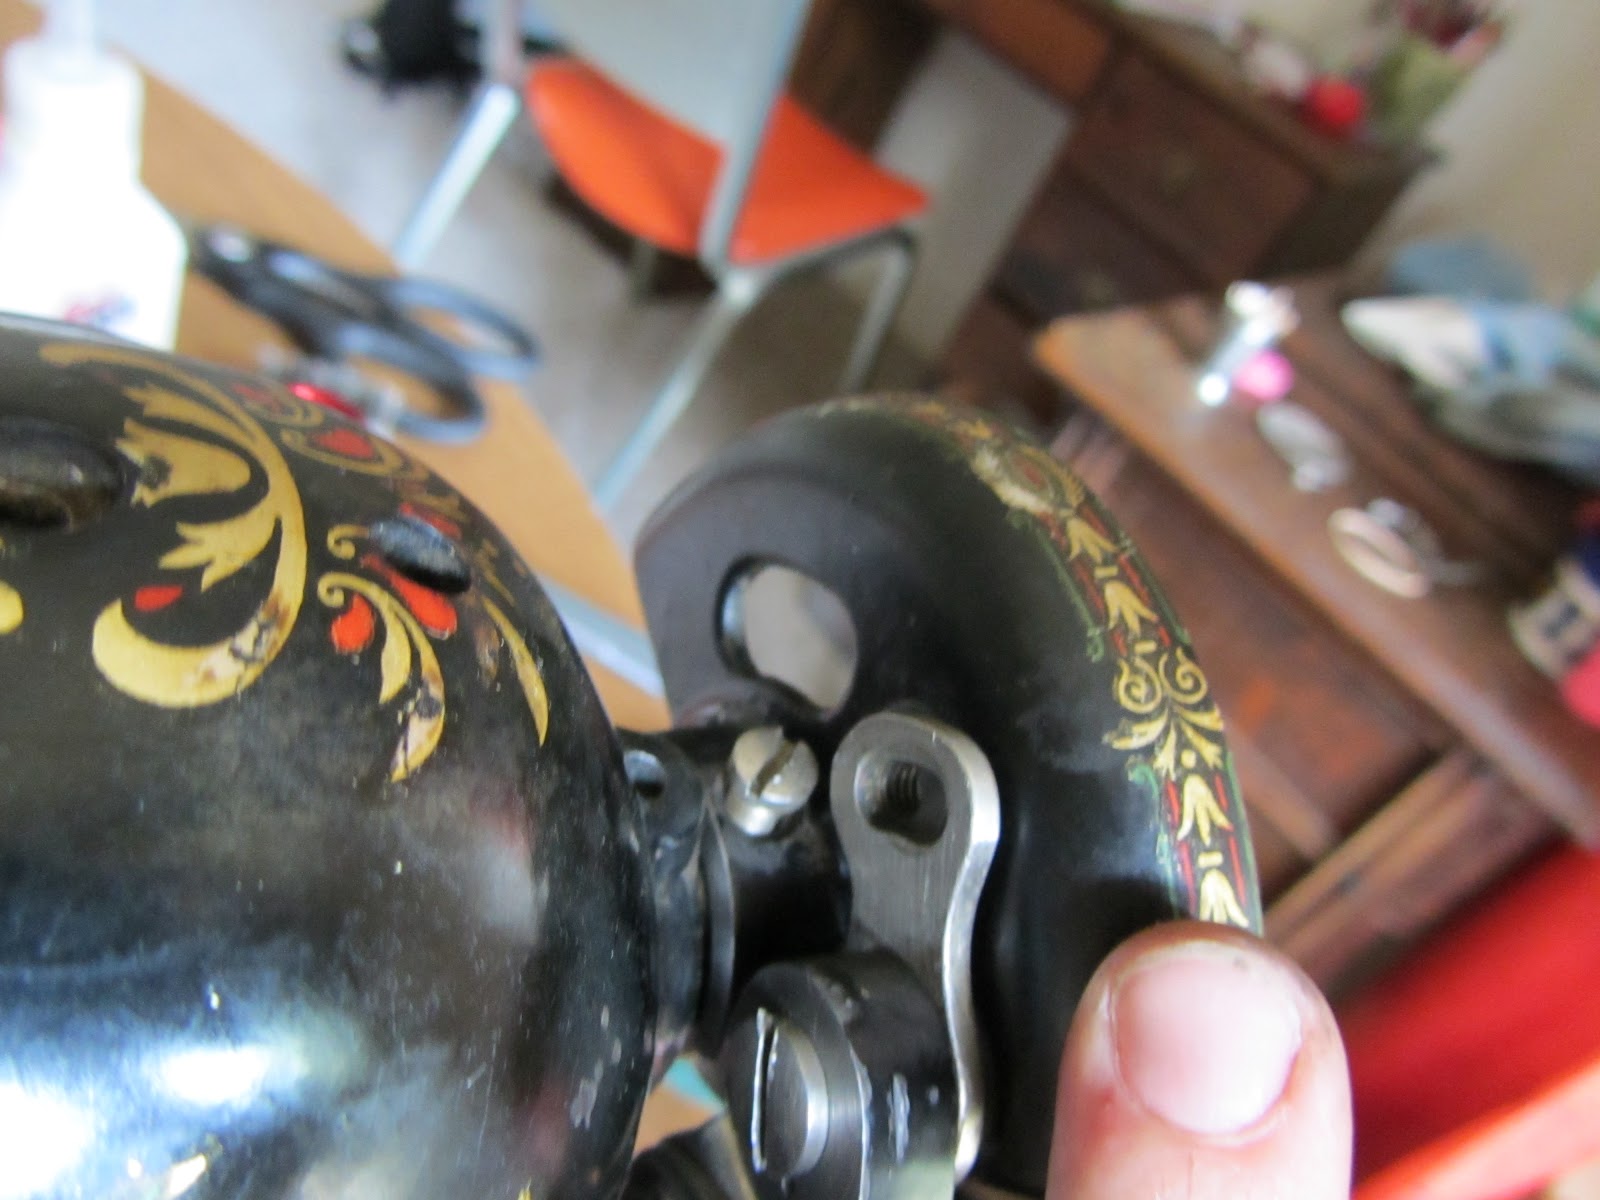
Then this small screw goes through the hole shown below.


Now for the wheel and stuff.

This screw:

Goes here:

Then the wheel slips on...

And then this doohickey...
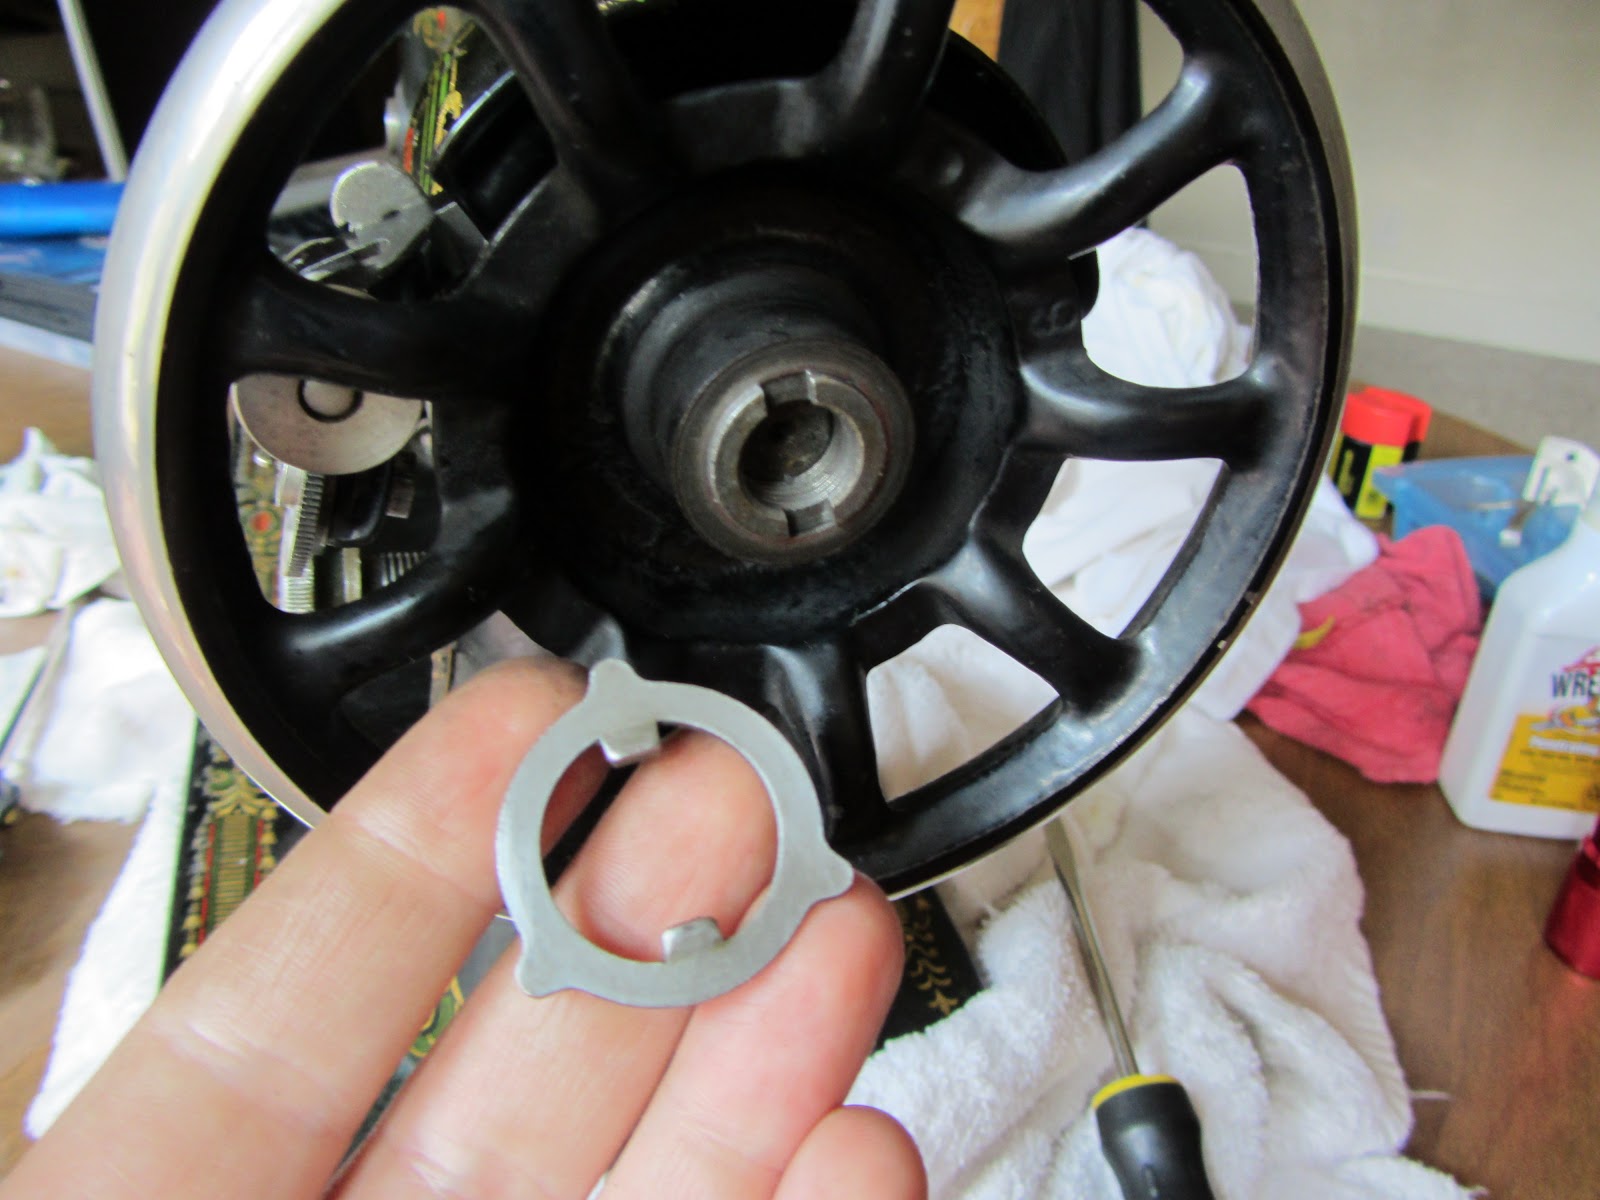

And finally this screws over the end!

And that's it! Forgot to take a photo of it all together, but here's an old one from before I took it apart.

Next time, the tension assembly.
thank you for this excellent post
ReplyDeleteI really appreciate your posts on refurbishing old Singers. The pictures are really helpful. Thank you for your attention to detail!
ReplyDeleteThank you. You saved me. I took it apart, cleaned it. Then stood there staring at the many little pieces with complete confusion. Thanks again...:)
ReplyDeleteI'm so glad this has been helpful to people! I sure benefited from others who have written about the process online.
DeleteI just had to stop in the middle of cleaning my 1913 Singer 66 to thank you. I love your blog & have read all of it on the 66. I found mine in a barn. So it needs major clean up. I was so frustrated until I found you. It has been great help I know I will return a lot
ReplyDeleteThank you again.
Sheila g.
Thank you so much for this. I'm currently disassembling my new 1922 Singer 66's bobbin winder, and your detailed pictures were a huge help! (Plus, it's always good to have a list of all the bits so I know that I caught everything when one of the springs leapt out during disassembly.)
ReplyDeleteI just experienced my first successul bobbin winder restoration on my 66 Singer Lotus thanks to your wonderful blog. Thanks so much. Keep up the good work.
ReplyDeleteSheila Ward
Sew Forward
Louisville KY
from a complete pile of parts to fully assembled in 15 min with the help of your post
ReplyDeleteThanks, Tom
Almost packed away my new ( to me) 66 because putting the bobbin winder and wheel back on after major cleaning was like they didn't go on the machine. Thanks much for doing this, I have really been looking forward to using this 1919 treadle. You're a real treasure here.
ReplyDeleteHow could you possibly know my "new" 1919 model 66 treadle needed exactly your photos right now??? Ah...serendipity personified...the World Wide Web is wonderful! So many, many thanks, and my not-yet-named honey thanks you, too.
ReplyDeleteWow! Here I am 66 years old and I managed to get the Singer 66 Old Girl back together thanks to YOUR wonderful detail description and photos. That convex/concave washer gave me a bit of trouble. And understanding the “worm” concept of the bobbin arm that moves the thread behind that cam. Many many thanks!!
ReplyDeletewhat size is the screw in picture 30 i need one to mount the bobbin winder dont think it would be easy to carry the sewing machine in a hard ware store to buy one
ReplyDeleteYour Doohicky is on wrong. It isn't suppoded to be aligned in the grooves as you would think. I learned that from a You-tube video..I got two i want to combine to make one good working 66, but I'm still learning and not sure I am ready to yet. Your doing great tho!
ReplyDeleteI did it! With your unknowing help. My 66 winder is back together again. Thank you!
ReplyDeleteThanks so much. I had also had the tail of the largest spring in the wrong place.
ReplyDeleteYou are a godsend, thank you.
ReplyDeleteThank you, thank you I am in the middle of putting this bobbin winder back together and I am really having problem holding the springs to get the mechanism to function properly…your photos are really helpful.
ReplyDeleteHello! Poor soul here, love this so much! I've been cleaning up one of these machines and was absolutely dreading this part, but you've helped a lot!
ReplyDeleteThis post is really useful. Sewing Machine Spare Parts
ReplyDeletecustom embroidery digitizing
ReplyDeletecustom embroidery digitizing