Sunday, August 10, 2014

Lessons Learned - Bikini Sewing

Okay, before I let another month pass between posts, I'm going to share the rest of my "lessons learned" from sewing my first swimsuit. After that, it's time to move on to other sewing projects because holy moly - fall is coming!

10 Tips for Sewing Your First Swimsuit

Tip 1 - You kinda really don't need a serger

I say kinda, because I found I could get away with using my sewing machine for almost everything. Also, serger seams with all their extra threads tend to add bulk, which can be a real problem for a neatly sewn bikini (more on that later). By my fourth try sewing bikini bottoms, I was only using my serger for joining up the crotch and side seams, which is really the easiest part of the process.

serged side seam on bikini bottoms
Sewing these seams was the first step in sewing my bottoms. I tried doing this on my sewing machine to see if I could get away with not using my serger at all, however, it tended to stretch the seam out as it sewed. So I ended up using my serger for these seams and nothing else. I'll bet if I spent enough time fiddling with the tension settings on my machine, I could get it to sew these seams just fine. So if you're worried about sewing a swimsuit without a serger, I say go for it! It just may take a few practice trials to get the right stitch tension.

Tip 2 - If you have a walking foot, use it. 

walking foot on my Husqvarna
When I first tried sewing the Bombshell swimsuit last summer, one thing I couldn't seem to wrap my mind around was how I was supposed to pull slightly on the fabric or elastic at the front of machine while I sewed and at the same time still get the fabric to advance under the needle. With wovens, that doesn't seem to be a problem. With spandex, it felt like a tug-o-war where everyone was losing. I think using my walking foot really helped with this problem. I could put tension on the fabric in front but still get everything to advance forward.

Tip 3 - It's possible to unpick stitches in spandex - even serger stitches.

For some reason when I first tried sewing spandex, I had a mental block again unpicking my stitches. I thought for sure that what with using a serger that uses a million threads and cuts your fabric as a you sew, if you didn't get it right the first time you were pretty much f-ed. Don't know why I thought that, but it's not true. Behold this lovely piece of sewing:

bikini side seam gone wrong
I don't know how I managed to match up such a short seam so poorly. But I was able to unpick it and redo. It wasn't a whole lot of fun, but I fixed the error and my final product was no worse for it. I also found that it's possible to press spandex with your iron AT A VERY LOW HEAT. You can do it, just be careful.

Tip 4 - Sew the main seams of your lining and outer fabric separately, and then combine the two.

For my first pair of bottoms, I sewed the lining fabric and outer fabric as one, as though the lining was an underlining. I even carefully basted the two layers together to make it easier to sew them as one.

lining and outer fabric basted together
I think I learned this method from the Bombshell pattern. But when I looked a pair of RTW swim bottoms, I found that they had sewn the lining and main fabric separately at the main seams, and then inserted one in the other. To illustrate, here's a picture of my first pair, with underlining method, next to my final pair, with lining method.


On the left, you can see the serged seams are exposed on the inside. On the right, they are hidden between the lining and main fabric. I'm not sure that this makes much of a different in comfort for wearing the bottoms, and I'm almost certain you can't tell the difference in looks from the exterior, but I just like the second method better for how it looks on the inside. Also, I think it helps reduce seam bulk a little.

Tip 5 - When sewing the main fabric and lining together, line up the seams and position seam allowances in separate directions.

Once you have sewn your main seams (sides and crotch), all you have left to do is put the lining inside the main fabric and start sewing on the elastic. A good way to minimize bulk at the seams during this step is to make the seam allowances of the lining and main fabric point in opposite directions. I tried to show this in the picture below.

Seam allowance of main fabric is pushed to the right, seam allowance of lining is pushed to the left.
Thanks to Brian's awesome video tutorial on inserting swimsuit elastic, I learned that getting a neat finish on a swimsuit is really all about reducing bulk whenever possible. This is one way to achieve that. Which brings me to...

Tip 6 - Neaten all edges before sewing.

In a regular garment, you can sew a seam and go back and clean up the seam allowances later, trimming away the excess and finishing them however you choose. Once you get to the point of inserting your elastic in your bikini, however, you need your seam edges to be nice and even. The reason is that you'll be using a zigzag stitch that is supposed to just barely catch the edge of your fabric as you sew - and that's hard to do if your fabric edge is sometimes 1 mm from your elastic and sometimes jumps out suddenly to 10 mm. For example, if you look at this seam, you can see where some misaligned seams left me with a little jump or stair step in the leg opening:


In a different sewing project I wouldn't sweat that little imperfection, since it would fall within the seam allowance anyway. But for a swimsuit, you want to trim away that stair step to make a nice continuous line for inserting your elastic. Again, Brian does an excellent job of explaining these sorts of things in his tutorial, so I recommend you watch it. Sorry if I sound like a broken record, but Brian saved my bikini and now I love him forever. That being said... my next tip goes against Brian's advice.

Tip 7 - Zigzag top stitching is easier.


And I think it looks just as nice. When it comes time to flip your elastic to the inside and top stitch it down, Brian prefers a straight stitch. I tried this, and found it very difficult to get a consistent stitch length, what with the elastic and stretching as you sew and all that. Here are two samples of my top stitching:

top stitching with straight stitch
You can see in the photo above where my stitches got quite small in places. It was especially hard to control the stitch length over the bumpy side seams (once again - bulk is bad). Your sewing machine might handle these things better than mine, but I preferred the results I got with a zigzag stitch. 

top stitching with zigzag
Again, it was hard to keep a consistent stitch length and you can see where my stitches got narrow at the side seam. Overall, however, I think I liked the zigzag stitch better. Brian thinks it looks less professional, but I'm okay with it.

Tip 8 - Just go slow.

I think this is true of a lot of tricky sewing. Things that seem impossible become simple if you just slow down. I didn't bother doing basting stitches after that first bikini. They were a pain to rip out later, and I found that I could achieve just as nice a result if I pinned carefully and slowed down.

lining pinned to main fabric, ready to insert elastic

Tip 9 - Use a wider elastic at waist and under bust.

I didn't do this on my first bikini, but after wearing it all day on the river I noticed that the waist and under bust elastic want to flip the wrong way. You can kinda see how the bikini top also wants to ride up under the bust in the photo below.

wrinkles at under bust from top riding up
Next time I'll use a wider elastic and hopefully that will stay put better. No big deal.

Tip 10 - Don't substitute regular elastic for swimsuit elastic.

I thought I could get away with this when I ran out of swimsuit elastic while finishing the swimsuit bottoms for my roommate. But just like jersey and spandex do not have equal amounts of stretch, neither do regular elastic and swimsuit elastic. Here's a crappy cell phone pic to demonstrate:

regular elastic in left leg hole, swimsuit elastic in right leg hole
Can you see how the regular elastic on the left created a smaller leg opening than the swimsuit elastic on the right? The regular elastic resulted in an uncomfortably snug fit. I ended up having to unpick all my zigzag stitches. Not fun. I don't know why I persist in trying shortcuts like this, because the end result is almost always the same - unpicking stitches.

So there are my ten tips! I hope other swimsuit noobs find some of these helpful, and that they send you on your way to your first of many successful swimsuits!

Sunday, August 3, 2014

Lessons Learned - Bikini Drafting

[This blog post is going up much later than I intended! My sewing exploits were interrupted this month by a change of houses, but now I'm settled in again. Time to pick up where I left off...and sorry if this seems so last month - because it really is!]

First off - Holy crap! I was not expecting my last-minute submission to the Sporty Summer Sewalong to be chosen from among all the contest amazing entries. I jumped out of my chair when I saw that Karen has listed my name in second place, and I ran and woke my husband up from his nap to tell him. (I had to repeat myself later when his grogginess subsided.) Maybe I shouldn't have disturbed him, but this is how sewists get their kicks. It's also nice to ogle all the other fantastic makes for the sewalong. Here's just a few to admire:

Some professional looking golf shorts by Nilla at Purple Pleats:


A flattering one-piece by Marilla:


And of course the winning entry by Canal Couture really takes the cake for sporty sewing. I love that she tackled making a highly functional garment for her boyfriend that suits his profession perfectly:


As I've been rather lucky when it comes to winning things around the sewing blog-o-sphere, I wanted to share some of the things I learned in the process of sewing my first swim suit. Hopefully some of these tips will help others struggling through their first adventures sewing bathing suits or other spandex-y things. I have a lot of stuff to say and pictures to share, so I'm breaking this up into two posts. This post is mostly about drafting, and I'll put sewing tips in my next post.

Tip 1 - Jersey ≠ Spandex

In trying to make my swimsuit, I first cut apart an old pair of underwear, thinking that this would give me an excellent starting point for drafting the bottoms.


Unfortunately, I wound up with bottoms that were an excellent fit for my size 0 roommate, instead of for size 10 me. On the bright side, I now have a pattern that is perfect for my roommate, and I made her a pair of bottoms too!

Tip 2 - Drafting bottoms to cover your bum

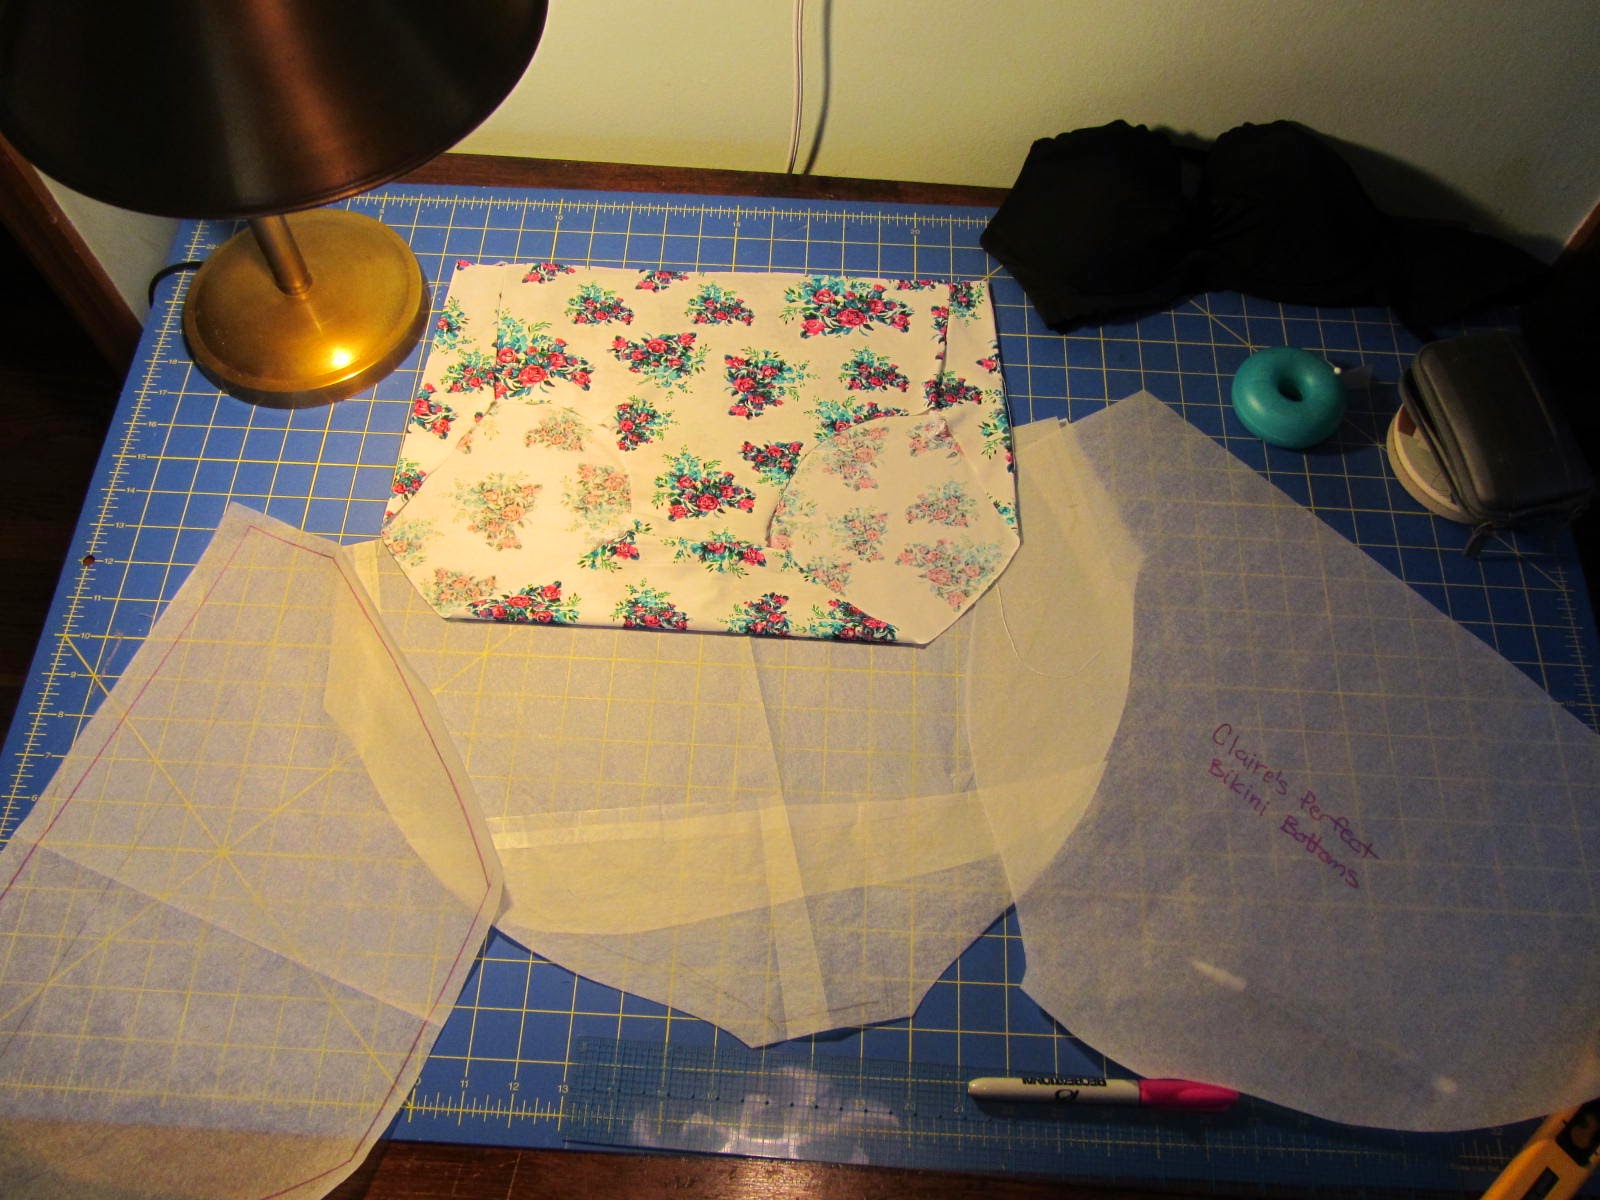
I don't know if this is exactly a tip, but when I finally arrived at a pattern that provided full bum coverage, it looked like I had drafted a diaper. Here are some pictures of my final pattern (left) next to the first version (right). This is the back:


You can see some of the differences better when I lay the patterns on top of each other:


That's a lot more paper/fabric in the final pattern. It took many different alterations. The most important one for bum coverage was dropping the leg hole seams and rounding them outward. The side seams were vertical lines in the original pattern, but this squeezed the crap out of the tops of my thighs, so I angle those out. My hips don't go straight up and down, so neither should my side seams. I also changed where the crotch seam is placed. In my original pattern, it was more toward the back. The extra length you see on the crotch on my finished pattern above brings the crotch seam more toward the front.

Here are the front pattern pieces (new on left and old on right):


You can see the crotch part got shortened on my final version of the front piece, so even though I lengthened the back crotch, the overall crotch length stayed them same. Why did I move the seam forward? Because you see how the original front pattern piece has a curved crotch seam? The back pattern piece had a straight seam, and joining the two was awkward and required many pins.


Also, that seam fell right at the area where I was having fitting issues (i.e. the bottoms were looking "cheeky" in that particular spot). I was trying to figure out how to add extra coverage right at that spot, and the seam there was making it more difficult. So I moved the crotch seam forward, and it solved everything. I have now said "crotch" way more times than I ever expected to in a single blog post. Crotch crotch crotch. Moving on... here are the two versions laid on top of each other


Besides changing where the "you know where" seam was located, I also added a whole lot more width at the sides. Like I said, the originals were sized for someone much smaller than I. So this is took them from a size 0 hips to a size 10 or larger hips. Also, the original pattern had the side seams more toward the front than at the actual sides. That makes sense for underwear, I think. If the seams are toward the front, they are less likely to show through your pants or skirt than if they were exactly at your sides. So the extra width I added moved the seam to my actual sides, which is fine for swimwear. I also angled the side seams out at the bottom (because hips).

Wow. That was a lot of info for a "tip." But I hope it helps for other people trying to alter their swimsuits to cover their bums.


Tuesday, July 8, 2014

Sporty Summer Sewalong - Claire Befriends Swimwear!

Watch out viewers. I'm posting pictures of myself in swimwear for the first time on this blog. Just keep in mind, this is for SCIENCE.


This bikini represents an epic sewing feat for me on so many levels, or else I might not have posted photos of myself so scantily clad. First of all, this swimsuit is a year in the making! Last year I attempted swimwear for the first time when Heather Lou put out her beautiful bombshell swimsuit pattern.


I was so hopeful about that pattern working for me, especially after seeing so many beautiful versions made by other seamstresses. But I didn't know how to use my serger very well at the time and the results were rather sad. I shelved the bombshell for that summer, but the longing to sew some perfect swimwear stayed in the back of my brain until this summer rolled around... along with Karen's Sporty Summer Sewalong!


The sewalong was a nice nudge to get me going on finally making the swimsuit I'd been envisioning for a year - one in a pretty floral print, slightly vintage look, and full bum coverage. The cheeky look is alright for some, but I'm more comfortable with both cheeks hugged by some granny-panties style bottoms. (Also, can we stop using the term granny-panties and think of something better?) For a while there I thought I would just buy one, but suits that cover your rear are few and far between, especially in a two piece. And when I did find some possibilities they were sold out in all the larger sizes. Am I just getting too old for two pieces? Should I give up just let my butt hang out?

NO. I will make it myself. And I did. It took me four tries. But it was totally worth it.


I find it terribly awkward to pose for photos when I'm fully clothed, much less nearly naked, but holding a ukulele helps.


The bottoms I made by chopping up some old unders and making a pattern.


I cut the elastic off the edges so that the fabric would lie flat. Then I traced it and added some seam allowances. This did not work nearly so well as you might think it would. Maybe it's because spandex is less stretchy than jersey? That must be the case, because when I sewed this up in my swim fabric it was definitely too small. So I tweaked the pattern, sewed it up again, tweaked the pattern, sewed it up again...


After several renditions, I finally got something that covered ALL my bum. And even though there are some things I think I still might change on future versions, I'm very happy with how these turned out.


Actually, having to make several pairs of bottoms was a great learning experience. I was much better at working with the spandex by round three or four, especially after viewing this awesome video from BrianSews:


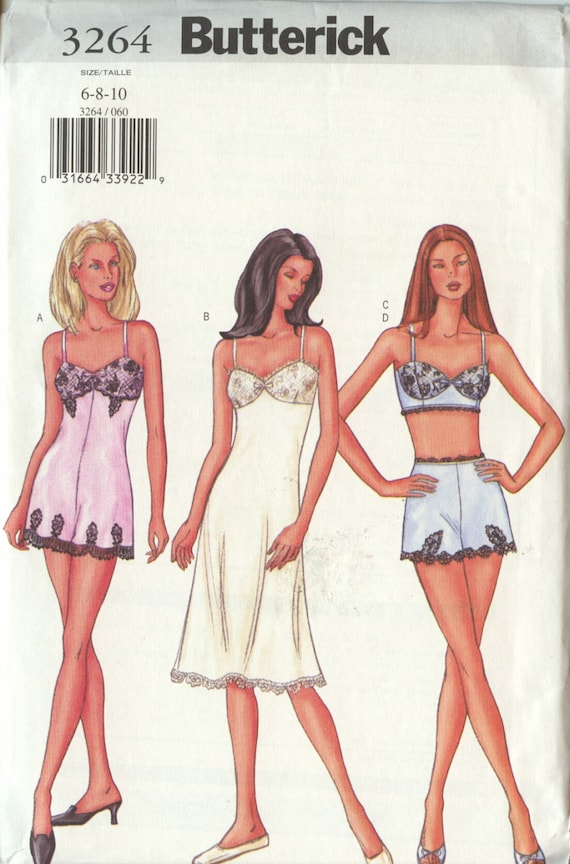
Also, sewing the top was a breeze compared to the bottoms. I used Butterick 3264 which has been in my stash for a few years.


Aside from adjusting the cups a little for a smaller bust, I didn't have to change a thing on this, although I did eliminate the closures in back. After messing around so much with the bottoms, it was thrilling to get a near perfect fit first time around on the top.


Do I almost look like I know what I'm doing with this ukulele? The only other prop we could come up with were fun noodles. But there's not a lot of ways to hold a fun noodle without compromising my blog even more.

I'd love to share some construction photos and things I learned, but I will save that for another post as I have to quickly submit this in time for the sewalong deadline! In parting I would just like to say that sewing swimwear is hard, but it does get much, much easier with a little practice, and it's totally worth it!


Saturday, June 28, 2014

Fabricmart v. Claire, Round Two

I could only hold off for so long, guys. I thought I was over my compulsion to shop the Fabricmart sales. But then I was browsing through the review gallery on Sewing.PatternReview, and saw THIS:


Tanya sewed up a beautiful pencil skirt out of the same rose print pique that I had been eyeing for... a pencil skirt.

and it's still available here!
I really admire Tanya's sewing (she blogs at Mrs. Hughes), so once I saw the awesome skirt she made it didn't take long for me to go online and buy some for myself. I also purchased a few other things because I had to make the most of my "welcome" 20% off coupon and the flat rate shipping. You know how it goes. Some of the things I had my eye on before seemed to be gone, or else they no longer held my interest. So I ended up with this instead:


It's a rayon ponte knit (still available here). Lately I've been getting a lot better with my serger, and I really want to start sewing with knits. Ponte seems like a good starting point, since it's sturdier and (I've heard) fairly easy to work with. I've also heard that some people don't like ponte, because it often contains a lot of polyester. This one didn't have any poly in the content, however, so into my cart it went.

And finally, I also purchased a little of plain ol' black jersey knit, also rayon. I want to try this raglan T from Burdastyle...


... only with a bra, because the above look just wouldn't fly at the office.

That's all for now! Now to stop looking at fabric and starting photographing some makes. I have a lot to show!

Thursday, June 12, 2014

Resisting the Urge

Oh boy, I need some moral support to help me resist buying fabric this week! I'm in a tough situation and highly susceptible to temptation right now! Here's the problem:

1. I'm covering shifts at a job where there's lots of time to browse the internet.


2. I have a penchant for browsing the "Fabrics and more..." message board over at Sewing.PatternReview...


3. Through said message board, I discovered mega sales over at Fabricmart:


4. I just got a new job (starting next week) which gives me a real grown-up salary!


5. This job requires business casual attire, of which I have very little, which is a good way to justify buying fabric.

Can you see why this is a recipe for disaster!!?? Yesterday I only browsed, then resisted. TODAY I ended up with things in my cart and my bank card out, then resisted again. Phew. It was a close one though. And I only just got done talking with a coworker about trying to limit my fabric stash! I need an outlet for my fabric fantasies and frustrations, so I'm foisting it on you guys. Maybe if I show you all the things I'm thinking about buying I will purge myself of the need to actually buy them.

First off, we have some "mint slubbed rayon suiting." I'm not sure what exactly to expect from this, but I like the sound of it and it's only $1.99 a yard. I KNOW.


This could make a really nice sheath dress and matching summery jacket for, oh, $10 or less. Resist! But if I didn't resist, I'd probably use McCall's 6460 (which I have in my stash) and make the short sleeve raglan version:

And then use McCall's 5668 for the jacket (another stash pattern):

Then there's this stretch cotton pique in a beautiful rose print:


If I got my hands on this, I'd probably make a pencil skirt. I recently made Colette Patterns' Lily as a skirt (blog post coming as soon as I take photos), and I'm eager to make another, and another, and another...


Fabricmart also has a whole bunch of cotton/silk voile from J. Crew, and I could sure use a basic white blouse...


And I was also drawn in by this striped shirting, which could make a really cute button-up to pair with the navy pencil skirt I just finished:


You can bet I'd play around with some diagonal striped patch pockets or peplum or something.

I do feel a little better now that I've gotten all that off my chest. I'm going to keep on resisting. For today at least. What are you resisting lately?

Tuesday, June 10, 2014

Visiting old friends - McCalls 3562

Have you ever held an idea for a sewing project in your head for so long that when it comes time to sit down and sew it, you're no longer inspired?


I was going to make up this cute late 60s dress in navy with a contrasting yoke in white, maybe with some gold buttons to give it a jaunty sailor vibe. My mom gave me some lovely linen from NY Fashion Center for my birthday last summer, and the pattern and fabric have been dancing around together in my head for the past year.


But when it came time to put the two together, I wasn't feelin it any more. The hot Indiana summer is on its way, and when I sifted through my pattern stash and came across this one, I decided to shift my plans:


This is the same pattern I made a maxi dress from several years back...


Despite looking a little preggers in that photo, I love this dress to pieces. I don't even care about all its beginner-sewist flaws, like the fact that my straps are different widths where they cross over the shoulders and that the hem is uneven and poorly finished with some sorta weird stiff hem tape. I don't notice any of those problems when I wear it. All I notice is how lovely and swishy the rayon challis feels. I feel like a pretty pretty princess. A pretty pretty comfortable princess, since it is also loose and flowing - perfect for a hot Indiana summer. Isn't it nice to know that the sewing flaws we brood over sometimes don't matter at all in the finished project?

So I decided to make up this pattern again (in the shorter version this time), using my navy for the main body and the white for the contrast straps.


I love how it turned out! Also, if you tie the straps in front, you won't cause consternation in people who can't tell if you're expecting or not! (Although I could definitely still carry a basketball around under this dress if necessary.) Also, check out how vibrant and green Indiana looks in that photo. I haven't messed with the colors at all. C'mon Mom and Dad - don't you think you'd like to try Indiana out just a little?

Moving on, I traced off this pattern again in the shorter length because I have a feeling I'm going to want more of these. First of all, it's a super simple sew. One pattern piece for the front, one for the back, and a couple for the straps. No closures. Easy peasy. Second of all, it's the perfect dress to throw on when the weather is hot and you can't be bothered with anything finicky or clingy.


This dress also makes me feel like a pretty pretty princess - a low-maintenance princess who frequents farmers markets and likes berry picking. The lace helps. It is leftover from my sister's wedding dress, and I think it was the perfect finishing touch.


I sewed it on like a facing flipped to the outside, which made for a very easy hem finish. Here's the deets:

1. Cut two strips of lace of equal width and long enough to go around your hem when pieced together (unless you're able to cut one very long strip equal to your hem circumference).


2. Put your strips right sides together and serge or zigzag along one short end.


3. Press your seam allowance to one side. Turn your dress inside out and lay the right side of your long lace strip against the wrong side of your hem. Pin all the way around until you figure out how long you need your lace strip. If possible, make sure the seams on your lace fall somewhere inconspicuous, like at the side seams, and not at the center front - like I did. Whoops.


4. Mark the point where the lace ends meet. Serge or zigzag this short end together, and cut off the excess.


5. Finish pinning the lace to the hem, and then serge or zigzag all the way around the hemline, joining the lace and skirt fabric.


6. Press the lace to the right side of the garment. You probably want to use a press cloth like I did, or you might melt your lace (as I have done in the past). Try a test swatch first before putting any heat on it.


7. If your lace is shifty like mine, measure and pin the top edge so that it maintains an equal width all the way around your hem. Then you can either put a basting stitch in to hold everything in place or just charge right ahead and secure the top edge with a zigzag stitch. I used a basting stitch first, and I'm glad I did.


And that's all there is to it! Almost not worthy of a tutorial. I really like the result though - I'm always meaning to put more effort into embellishing my makes. I think I'm going to use this technique again, maybe to hem some shorts or the sleeves on a shirt.

Other things I did with this dress - I changed the back neckline to a V, partially because I thought it would look nice and partially because it allowed me to cut down past a weird bubble I had created in my French seams. This dress is all about embracing imperfections.


The neckline facing (which is on the outside and turns into the straps) is just kinda sandwiched inside of that center back seam. Not proper technique, I know, but who's gonna criticize me? I top-stitched the bottom edge of the facing to keep it secured against the bodice of the dress.

Also, I should mention that I cut the fabric on the bias for this dress. It's the first time I've dealt with a bias cut dress, and this is a nice and easy starter pattern for doing it. The pattern doesn't say to do this, but I thought it couldn't hurt.


I let the pattern pieces hang on my dress form for a day (maybe two?) so that they could stretch out. It created some weird puckers around the armhole where I had put in stay stitching.


You can kinda see the puckering in the photo above. I ended up pulling out the stay stitches to get rid of this, and I'm still not really clear on the rules of bias sewing. You're supposed to let the garment hang to stretch out, but what about areas that you don't typically want to stretch out? I read some forums on Pattern Review that say to let your garment pieces stretch out, then lay them down again with the pattern paper on top and trim off areas where they grew. That seems like a big hassle. I also read that some people recommend cutting your pieces with extra wide seam allowances, so that if they stretch vertically you don't loose too much width. That seems like an even bigger hassle. In the end, I put my stay stitching back in after I let the pieces stretch. I used twill tape or organza strips to stabilize the neck and armholes against further stretching. I hope my methods work, but only time will tell.

As for the bias affecting the drape of the dress - I'm not sure if it helped or not. Even though this is handkerchief linen and very lightweight, it's not particularly drapey, so maybe the bias cut helped a little. I definitely wouldn't make this dress in anything less drapey or much heavier - it's best suited to fabrics like the challis I used on the maxi version. But I think the linen works, especially for the short version.

Nothing else to report on this one, so I'll leave you with this glamour shot:


Haha! That's how I work it.