Friday, July 29, 2011

Sewing woes

I checked on my followers today and discovered that their numbers have doubled! Yes, doubled from two to four. Don't laugh you guys. This is exciting for me. Now I wish I had something awesome to post to encourage all four of you to keep reading, but the last week has been nothing but sewing disasters. Feel free to stop reading now. It's just going to get ugly.

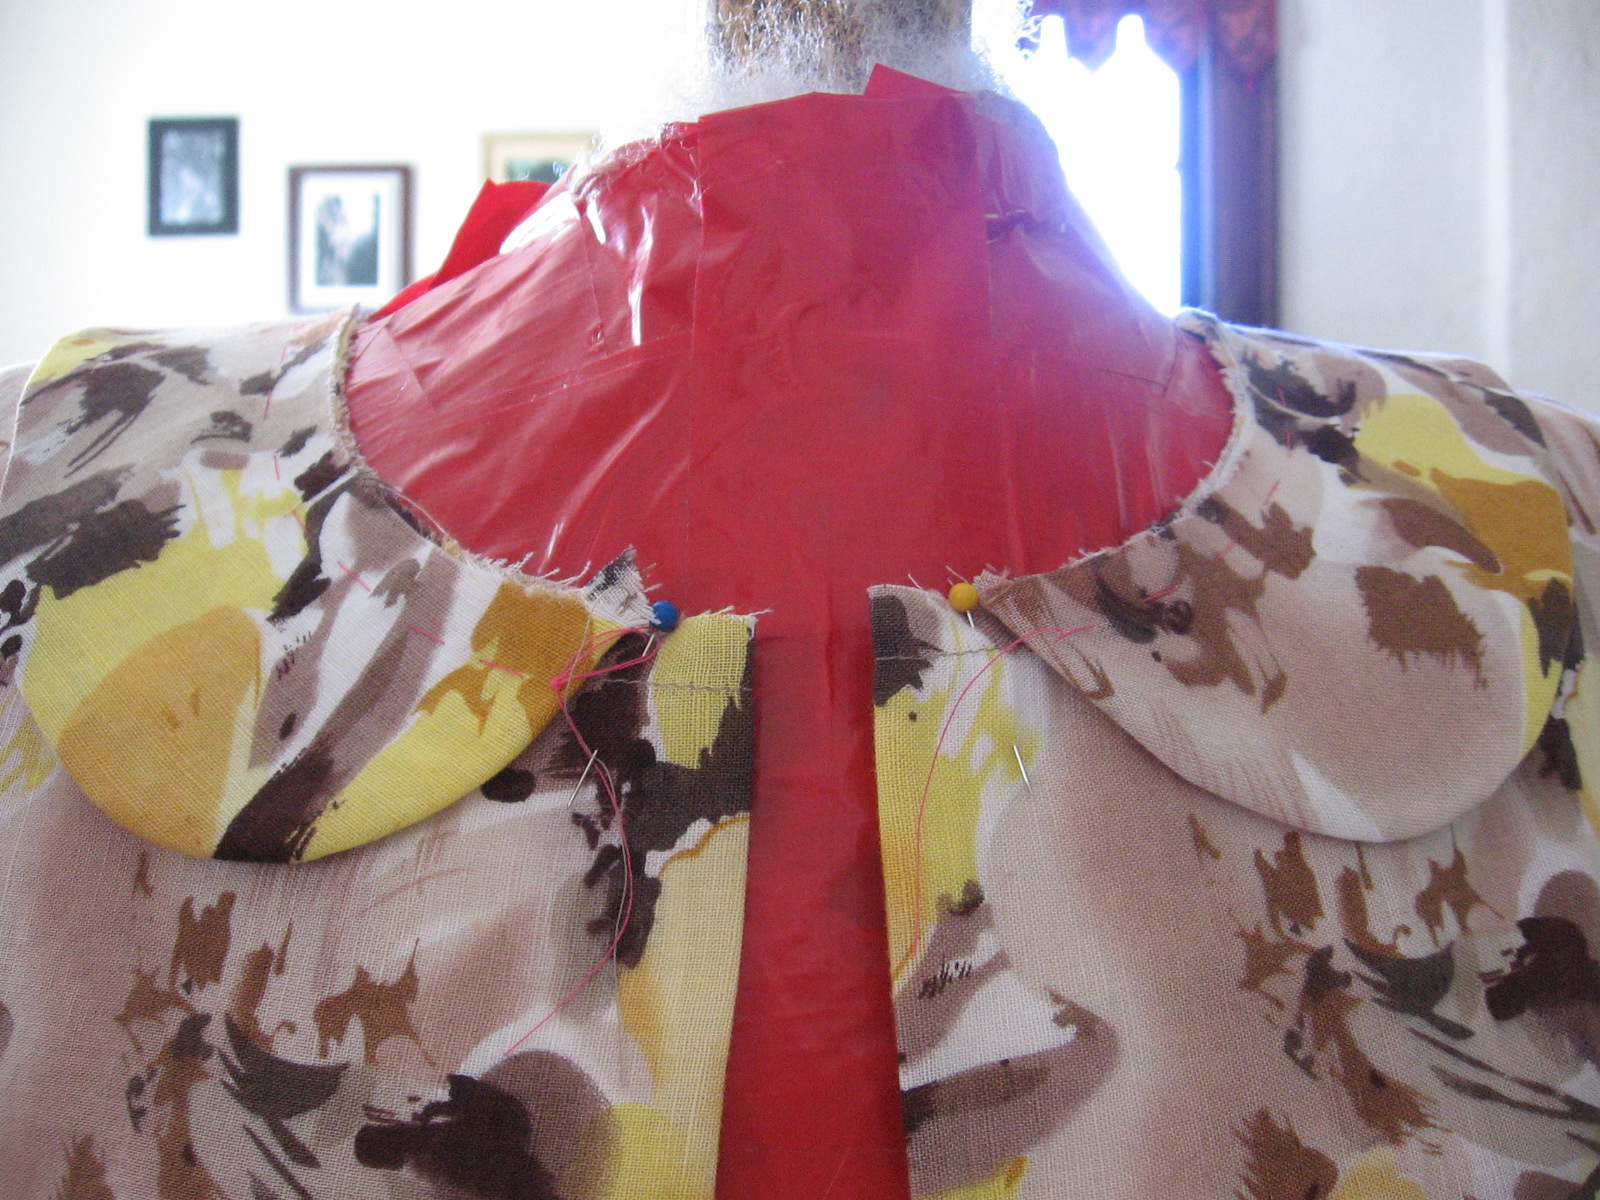
First, I whipped up a muslin of McCall's 6091 out of a bed sheet I got at Goodwill. Here's the pattern, as a reminder:


And here's the muslin/toile/mock up/whatever you wanna call it:


Ugh. Sorry everyone. I really do need a new camera. And a better place to take pictures. With some good lighting. And maybe a lesson in photography. But anyway, the dress - it looks like a nightgown, right? I do like the ruffly neck. Not everyone likes ruffles. Well, in the words of Mitch Hedberg, "I'm FOR 'em!" Like fancy toothpicks in a club sandwich. If you don't get that reference, please go watch some Mitch Hedberg.

Back to the dress. I didn't sew the casing for the elastic on very carefully, so it may be a little uneven. Even so, I just don't think this pattern is going to create a very polished looking dress. More of a sack with a drawstring. But it could be a very cute top if you cut it off at the hip. I stared at this for about a day, consulted a friend for advice, consulted Mom for advice (and received an earful about what different body types are supposed to wear - geez Mom, I don't think this makes me look flat-chested), and finally decided to choose a different pattern. So I bought McCall's 3562 off of Etsy, along with a shirt pattern for Josh (because someday I will sew for him - just not today). Here is the pattern:


Now if you're thinking "Huh, that looks like it still is essentially a sack with a drawstring" then all I have to say is "La la la la I can't hear you!" I may have made yet another bad choice, but I'm not going to admit it til I try this one out.

Now I couldn't just sit back and wait patiently for this pattern to arrive in the mail, so I decided to try out some pants from the Bella pattern from Burdastyle.

Bella #6011
I've had this pattern cut out for a year, and it's been under my bed waiting for me to gain sewing confidence. I've heard that Burda patterns favor curvy ladies, but apparently this pattern doesn't favor me. I spent a morning whipping up a trial version, and the result was so horrifying that I can't photograph it. I just can't. One reason is that my test fabric is hot pink linen (it was on clearance), and I'm a little embarrassed by it. The second reason is that the fit is so bad (too short in the crotch, too tight in the thighs, toooo large in the waist) that you probably can't even tell that these are pants or that they were sewn by a human. The third reason is that Josh took my camera to work and hasn't brought it back. So in summary: curvy ladies, pear shapes, whatever you want to call yourselves, "Steer clear of Bella!" It's not worth the headache. The only way I can imagine sewing pants that might fit is to go to Goodwill, pick out some pants that do fit me, tear them apart at the seams, and make my own g**d*MN pattern because apparently pattern companies just don't understand my butt.

We're about to move into a new house, so I can't imagine I'll have any finished projects to show soon. That makes me sad, but maybe I can distract the four of you with some photos of the new house once we're in. Til then, here's another project I'm dreaming of.

Gertie's Bombshell Dress Class

Gertie has an online class is creating a bombshell dress. And what would make a better bombshell dress than...


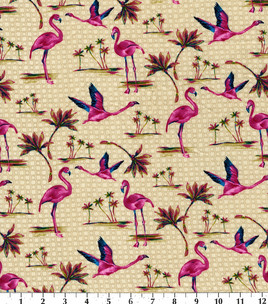
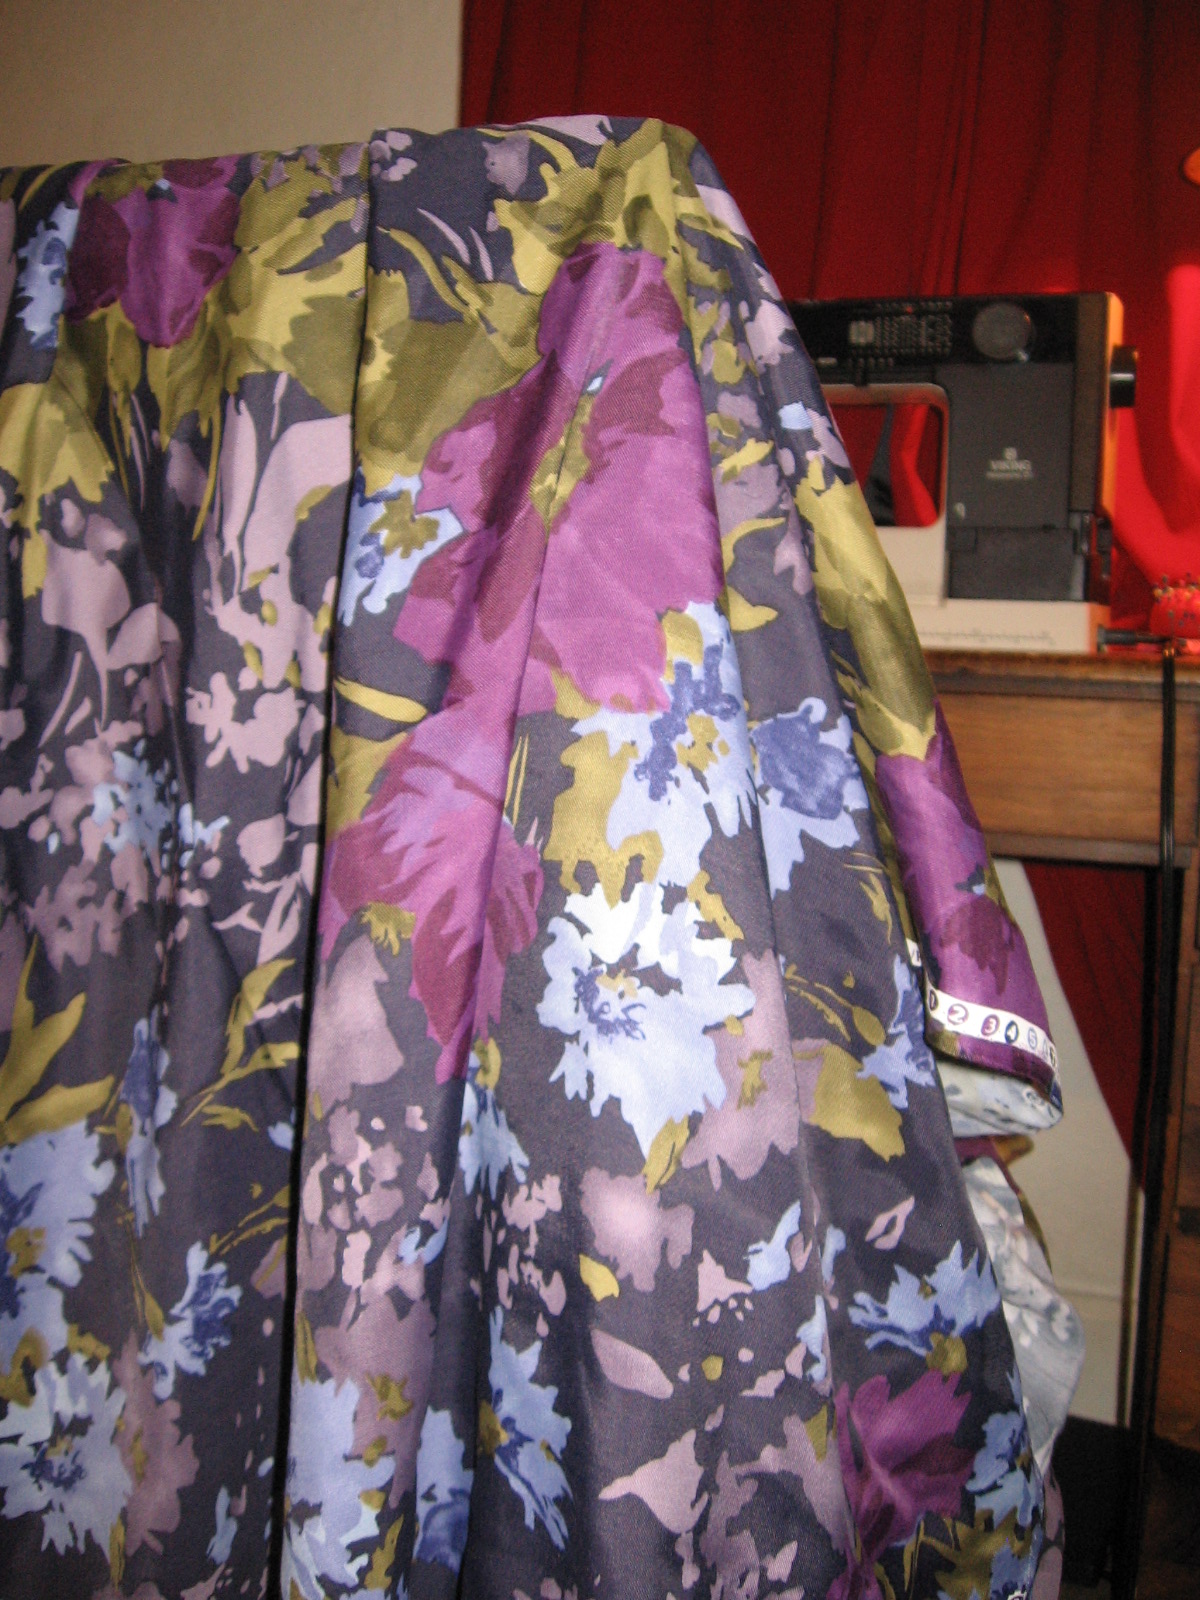
Pink flamingos! Sadly, I don't think I'm the type who could pull off this number. But it looks so good in my head! So as a compromise, I'm thinking about making the bustier top of the bombshell dress, and rescuing that hot pink linen to make a high-waited pencil skirt to match. Also, I only have 1.5 yards of this stuff because SOMEONE bought most of it up while I was waiting for a sale. Okay, so she lives in LA and might not be responsible for the shortage in Bloomington, but who else can I blame? This is a really weird coincidence because Sunni posted about this same problem on her blog this week.

That's all I've got for now folks. What do you guys think? About McCall's 6091. Or about our f'ed up government. Or about hot pink flamingos. Or anything really.

Wednesday, July 20, 2011

Maxi Dress

Bought this pattern on Etsy a month or so ago, thinking I would make a canary yellow silk maxi dress out of it.


Haha. Silk. Yeah right... Since I'm not at a point yet where I can handle sewing with silk (or afford it), I took Sunni's advice and started looking for rayon challis. Unfortunately, To sew view A or B of this dress, I need four or more yards of fabric, and my sewing budget just doesn't have room for a big purchase like that. At least not if it's new. Etsy isn't much cheaper either, and usually you can't find that much yardage. I did find something on eBay, but the picture was small, not many details were provided, and the seller's other wares were knick knacks and quilts (doesn't inspire confidence). On the other hand, it was going for $2/yard. Steal! So after ruminating over it for more than a week, I took the plunge and ended up with this:


These photos were taken at night so the color is a little off, but rest assured, this fabric is lovely lovely lovely. It drapes nicely, the colors are beautiful (indigo, moss green, deep purple), and I can't wait to get started turning this into a dress. Oh, and there's five yards. I hope this is the right pattern for it. What do you think?

Peter Pan Collar Tutorial - part 3

Just kidding. There is no part three. Why? Because it took me four tries to get my placket right, and I have no business offering advice on how to do it. What a headache. Four times. That means three times I had to rip out all my stitches and try again. And I cut a new placket at least once. Maybe twice. But let's talk about that later. Instead, how about some pictures of a finished blouse!


 Not so bad, right? I'm pretty happy with how it turned out, although I can think of a lot of changes I'll make on the next version. But first, I'm going to gloat about all the new things I tried that went right.
  • French seams - I did these on the shoulders and sides, and I really like the effect. Very neat and tidy on the inside. Also, I don't think it's any more time-consuming that zig-zagging the raw edges, which is what I usually do. And it probably uses a lot less thread. Triple bonus!
  • Seam binding - I did this on the neckline facing, and I might go back and do it around the armholes too. Looks pretty nice, although I kinda which the bias tape I used wasn't so stiff.
  • Tulip sleeves - I drafted these, and they are an easy alternative for someone who's afraid of set-in sleeves. Maybe I can draw some diagrams of the process and post it later.
  • Button holes - I've done button holes before, but this time I consulted my sewing machine's manual and figured out how to use its settings. One practice run and I was button holing like a pro. Sorta.
  • Hand sewn rolled hem - I did this on the sleeves, because after a few sloppy attempts on the machine and a lot of ripping stitches, I decided that hand-sewn is the way to go. It really does not take that long, and it's worth the effort. Next time I won't waste time trying to find a short cut, because short cuts just don't look as nice. Colette patterns has some info on hand sewing a rolled hem on their blog, here. The photos aren't great, but you get the idea.


Things I'll do differently next time:

  • Make the armholes larger - I guess this shirt pattern isn't a perfect fit after all. I need a little extra room, and I think this would also solve some pulling issues the blouse has when I stand in certain positions.
  • Try a new shape for the sleeve - I think it should probably be a little more curved without so much overlap, and also more flared at the bottom.
  • Sew my button holes vertically - Uh... now I know why button holes on shirts go up and down. It's because otherwise your buttons won't prevent the two sides of your shirt from moving back and forth horizontally. This was a really unfortunate mistake because to fix it I would have to cut a new placket. Yeah. Do the placket A FIFTH TIME. That's just not going to happen right now. Not to mention, I'm out of fabric.
  • Lower the neckline - More scoop! Scoop a doop.
  • Play around with the collar - It kinda sorta wants to flip upward. It's not that bad, but it could probably be better.
That might seem like a lot, but this blouse is definitely wearable. Plus, the fabric only cost a few bucks (odds and ends bin at Joann's), I didn't have to buy a pattern, and the buttons were on clearance. And also, a good lesson in patience (once again), the value of hand sewing, and how not to sew your button holes. I deem this one a success.

Thursday, July 14, 2011

Peter Pan Collar Tutorial - part 2

Okay, so when I left off yesterday, we had sewed our under collar and upper collar together. Now we need to attach them to the shirt. This is the part I had trouble finding a good tutorial for. How do you attach a collar to a neckline and have it look nice and neat on the inside? I'm no expert, but so far I have identified three ways, and I'm happy to hear of more if you know any.

1. Sew a yoke to interior of the shirt, using the edges to cover up the seam allowance from the collar.

The Negroni pattern from Colette Patterns uses this method - at least that's what it sounds like from Peter's sew-along.

2. Use some sort of bias tape.

I really know nothing about this method, but I saw this shirt on Etsy and it looks like that is what is going on here:

floral Etsy blouse
3. Sew a facing to the interior neckline and sandwich the seam allowances behind it.

This third method is the one I used and the one presented in my Reader's Digest Complete Guide to Sewing. I really didn't want to make a facing at first. I thought there had to be some kind of short cut. Maybe there is, but since I don't know about it I decided to just do things right. So I drafted a facing for my blouse pattern since it didn't have one yet. I didn't photography this process, but Gertie gives you the basic idea here, just for a different style of pattern. Essentially, your facing needs to follow the same lines as your neckline and needs to be two inches wide. Plus a little for the seam allowance. You can pretty much lay your front and back shirt pattern pieces down and trace over them. You can do an all-in-one facing like I discussed in part 1 of the collar tutorial, or you can divide it up by cutting at the shoulder seams (remembering to add seam allowances!)

So, here we go...

Step 1 - Cut our your facing pieces. Interface them if you want.
Step 2 - Sew your facing pieces together at the shoulder seams (unless you made an all-in-one facing).
Step 3 - Set your facing aside and pick up your collar. Line it up to the neckline of your blouse, right sides together.

The alignment here can be tricky. Here is my blouse at this stage:


Here I'm trying to establish where to line up the front of the collar. This blouse has a placket that is going to fold behind to create it's own facing. So I don't want to include that in my measurements. The part that is to the right of the purple pin is what will become the facing. The blue pin is marking the center of the area that will become the button placket. It's the center front of the whole blouse. That's where I want my collar to meet up at the center. The yellow pin is marking down 1/2" from the top, which is the seam allowance I'm using. This might not be the same as yours since 5/8" is usually standard (curse your strange measurements, Built by Wendy!). So, the intersection of the blue and yellow pins is where I want my collar.


See? The top edge has to line up with the neckline edge, but I want that little curve to hit right where my pins intersect. It's all very nit-picky, but it's necessary. Once this is lined up, line up the collar on the other side the same way. Pin in place. Then line up the shoulders and the center back. Then baste your collar down like so:


It looks a little funky right? It's because of those darn facing extensions. But if I fold those back, it looks like this:


There's still gaps between the collar and the edges of the shirt, but those will overlap when the buttons are done up. Warning though, you don't want to fold those facings down for this next part. Let them hang off to the side still.

Now that you have the collar sewn down, you can pin the neck facing to it. Place the neck facing over the collar, right sides together, matching up the neck edges, shoulder seams, and center back. it will look like this:


Now you can sew all these layers together on your machine. Don't sew over the facing parts though! It's going to be a lot of layers to sew through, so go slow and make sure you're catching the right stuff and not the wrong stuff. When you're done, the facing will fold to the inside of your shirt and the seam allowances will be hidden behind it, like this:


Yikes! That doesn't look so good. Don't worry, I just need to trim the seam allowances, clip the curves, and iron it down nicely. I did a zig zag stitch on my seam allowances too, and one along the bottom edge of the facing as well. I don't know if it's necessary to zig zag the seam allowances since they will be hidden, but I did it just in case. Now my blouse looks like this:


Much better, right? The facings in front still need to be sewn back, but I'll go over that tomorrow. That's enough for now. Good night!

Wednesday, July 13, 2011

Peter Pan Collar Tutorial - part 1

I haven't been able to find a step-by-step guide to making a peter pan collar. (Or is it Peter Pan collar? It's a proper name after all). As I mentioned before, Gertie has a nice tutorial for drafting one, but she doesn't show how to sew it on. This site provides some written instructions, but few pictures. And what I really want is a tutorial for a shirt which buttons up the front, which neither of the above do. So I've consulted a few resources, including my Reader's Digest Complete Guide to Sewing, and I'll try to document it here in case anyone else out there is trying to do the exact same thing.

So, I started with a basic button-up blouse pattern that I know fits me. It's a Built by Wendy pattern that came with her Sew U book. It's actually kinda a crappy pattern in that it provides no guidance on seam allowances. You can read the gripes about that in the Amazon.com review. But it fits me well, and it's the only one I've got. Just to clarify, I'm aiming for something like this:


Buttons up the front, slight scoop neck. I had to redraw the neckline of my blouse pattern so it was lower, but I'm not going to document that here because I'm lazy and also I didn't take photos. I think you can probably figure that part out on your own though.

So, steps 1-3, go to Gertie's blog and do everything she says. Except, since this blouse buttons up the front, you can draft your collar to continue all the way around the back in one piece. In the front, it's up to you where you want the collar to end. Some collars I've seen stop an inch or so away from the center front, like in the photo below. Some meet together in the middle over the button placket, like in the photo above.


I want mine to meet together in the center, so here's what my pattern pieces ended up looking like:


You can see I drew the shoulder seam and the button placket (to the right of the dotted line) for reference. That little "I" is where a button would go. It's in the center of the placket. The center front of the collar also lines up here, because it's the middle of the shirt. The seam allowance extends beyond. I also drafted my under collar, just like Gertie directed. It's an 1/8" smaller than the upper collar along the lower edge. The neck edge is the same as the upper collar. Now, if you have enough fabric you can draft your collar pieces with just one pattern for the upper collar and one for the lower collar (and cut on the fold). If you don't have enough, you'll have to do like me and snip your pattern along that shoulder seam that I drew in. Then for each the upper and lower collar you'll have one piece that you cut on the fold and one that you cut twice. Don't forget to add a seam allowance at the shoulder seam if you do this. I forgot at first and had to recut. Also, if you aren't cutting your pieces with your fabric folded in half, make sure you flip the pattern piece between cutting two of the same - because you'll need one front collar piece that curves one way and one that curves the other way. This happens automatically when you've got your fabric folded in half, but sometimes I forget to think about that when my fabric isn't folded.

So, steps 1, 2, and 3 - follow Gertie.
Step 4 - Cut out your upper collar pieces from your fashion fabric and your under collar pieces from the fashion fabric and from your interfacing. (I used cotton batiste) Remember your seam allowances!
Step 5 - Sew on interfacing to the under collar (or iron it on if you are using fusible).
Step 6 - Join upper collar pieces to each other at shoulder seams and under collar pieces at shoulder seams.
Step 7 - Sew upper collar to under collar with right sides together, leaving the neck edge open.

This is where things get a little funky. The upper collar is a little bigger, right? So things aren't going to match up exactly. Start by pinning the ends and the center. Match the outer edges and ignore the neck edges. You'll have to to distribute the extra fabric on the upper collar evenly and use lots of pins, but it shouldn't be too difficult. They're only slightly different, after all.

Step 8 - Trim the seam allowance down to about 1/4". Clip the curves.
Step 9 - Turn the collar right side out and press, using a chopstick or some other handy tool to poke the edges out. You want to press it so that the upper collar slightly overlaps the under collar, like so:


Sorry for the blurry photo. I don't have the best camera or lighting. So in this photo the under collar is facing up, and the upper collar is just barely peeking around the edge. When you flip it over now, it will look nice and neat, like there's not even an under collar hiding around. Nice touch, right? With sewing, it really is the little things.

Soon I'll finish sewing this sucker on the shirt, and add some photos and instructions for that. If it goes well... Wish me luck!

* Drafting an under collar might not really be necessary. You could cut the under collar and upper collar from the same pattern and then just carefully trim off 1/8" from the outer edge of the under collar.

Tuesday, July 12, 2011

Rompomania

I'm not the only one with rompers on the brain. Sunni's been staring at rompers all day too. Check out all these she dug up around the interwebs:

Sunni's Pinterest Thingy
What is the deal with this Pinterest business? I'm too lazy to investigate, but two blogs I follow have mentioned it in the last week. It's an online inspiration board, right? Sort of like how people create flickr galleries? I don't have a flickr account, so I don't really know. I am dubious about spending time assembling things like this. How much time do we spend surfing and how much time do we spend sewing? And how much more could we accomplish if we just put the laptop away. And what happened to just getting inspired without staring at other people's work all day?

Of course, I'm also a guilty party. I have a folder with some inspiration pictures I've picked up around the web. And I spend way too much time browsing photos of projects before I get started on my own. But I'm working on cutting my web time down so I can boost my sewing time. And you really can't beat the internet when you need help with a specific technique. Speaking of which, I need instructions for sewing on a peter pan collar. Anyone? Gertie has a great tutorial for drafting one... I just need the next seven or eight steps.

Friday, July 8, 2011

Now what? Upcoming projects...

My first sewing success has renewed my sewing addiction, which is in direct conflict with my need to study for my qualifying exams. My academic adviser and I met today for lunch (and serious discussion about what I'm doing with my life). But after doling out the much-needed academic advise, she gave me some sewing advice. Conflict of interest?

She told me the Habitat for Humanity Re-Store was selling loads of fabric at $3/bag, so of course I took a break from the books to run over there and check it out. This is what I brought back...


First up is yards and yards of some sort of chiffony-synthetic-I-don't-know-what. But it's turquoise and polka-dotted and surely can become something wonderful. Any ideas? It's the same hue as the favorite color of my dear friend Adrianne. When I even think Adrianne, I think turquoise. And since me and hubby and Adrianne are moving to the same abode in less than a month (!) this could work it's way into some sort of home decorating project. Adrianne would love to paint the walls in shades like this, but since the landlord might not allow it, some artful draping or draperies might be made out of this.

Next up...

check it out! my glasses match

Is it ugly? I'm not sure. But I'm pretty sure it's rayon. I'm getting better about guessing fiber content. It's the kinda thing I'd make a maxi dress out of, if there were just more. Unfortunately, there's only about 1.5 yards by maybe 60". Enough for maybe.... a romper! Oh gosh I love rompers. Maybe because it's just so freakin hot here in Indiana during the summer. There's really nothing easier to wear. You can't see, but I'm wearing one now. I've thrifted about three in the last several months. Here are some cute rompers off of Modcloth:

Thanks a Bunch romper                                     Study Group romper                                 Colloquies on Chic romper
Unfortunately, I have no cute patterns similar to any of these. Well, how about these?

Modcloth again - Mulberry Tea shorts

These remind me of something else I thrifted - a silk skirt with possibly enough fabric to repurpose into some floral shorts, or maybe a Macaron.


It leans towards the old couch-y or worst, Easter-y, which is what happened to my blue linen dress. I don't wanna talk about it. So I think whatever I do with this fabric, it has to be at least a little edgy or different to avoid Easter Old Couch issues. I really love what NattyJane did with the Macaron pattern:

http://www.burdastyle.com/projects/nattys-copycat-macaron-dress
Would it be a big mistake to make a sweet version of this with a pastel floral? Sigh. Maybe so.

Saturday, July 2, 2011

The big reveal - Hot Summer Sherbet Dress!

Dun dun daaaaaa!

I finished something! And it's wearable! I'm pleased as punch, which is about the color of the dress I've finished. Take a look!


Not bad, eh? A little wrinkled, because as soon as I finished painstakingly hand-stitching down the facings, I rushed in the truck over to the vintage store that my sewing friend owns so that I could show it off to her. She is a wonderful lady. I started chatting with her once while browsing around her shop, and she told me she could answer my sewing questions from time to time. Poor nice lady, I'm taking her up on the offer every chance I get. And not only does she happily answer my questions when she's getting coffee at the shop where I work (I never let her just order and move on - that would be a missed opportunity), but she gifted me some free fabric last time she was in. A gift! It's some sort of beautiful silk in a white and brown dashed pattern - sort of like herringbone. She's just too nice.

Back to the dress. It's the McCall's 8305 in the linen/flax/? that my mom sent me. Thank you Mom! I think I've used it well. Oh and the earrings? They're from Mom too. Over all I am very proud of this dress. It may look quite simple, but I really took my time with it. The first big obstacle was the set-in sleeves, which I've never done before. I read Casey's tutorial here, and then promptly ignored some key directions. For example, Casey instructs you to do two lines of basting to gather the seam allowance. I read that and thought, "Two, why two? I'll just do one." If directions don't explain their logic to me, I'm likely to take the short cut. Well, turns out there is a reason for two lines of basting: It makes it easier. There. That's all I needed! Well, now I know. If you have two lines of basting, you are better able to control the excess in the seam allowance. Simple as that. Also, Casey told me to turn my dress inside out and insert the sleeve into the armhole so that it is inside the dress while you sew the two together. I didn't do that either. Turns out, that makes things easier too. Maybe I'll listen next time.

Here's something Casey doesn't say: you should hand baste the sleeve when you are attaching it to the bodice. She tells you that you can either do it by hand or with the machine, but there's no way I could have gotten it right first time with the machine. I tried and failed. Once I hand basted it though, it went in beautifully. So don't be lazy! Besides. It doesn't really take that long to baste around an armhole.

yeah, I see you lookin at my sleeve
Other things I did for the first time - I did a hand-picked zipper, referencing Tasia's helpful photos. Mostly I'm just afraid to try the zipper foot on my machine. I did once before, and I remember it went badly. I have a fear of invisible zipper from Sunni's horror stories (scroll down near the bottom). Apparently, you can't ever iron the zipper or baaad things will happen. Hopefully that won't happen here. I didn't stabilize my zipper either (like Sunni recommends), and I hope I don't regret it later.

Last of all, I finished the hem with pretty laces and I stitched all the facings down by hand. The facings were kinda a pain. My facings never match perfectly to the neckline of the garment. The should seams are always off and they always turn out too long or too short in the back. Or in this case, I thought they were too long, so I trimmed them, and then somehow they were too short. Oh well. I did discover, though, that it is much easier to stitch the facings while the dress is on a dress form - or in this case, on Eileen:


She may be made of duct tape, and she may have a slight uni-boob which is also slightly crooked, but she's a good stunt double. Sewing the rounded facings down works much nicer when they are lying on a rounded surface. I also adjusted the darts while the dress was on Eileen. I guess that might seem like an obvious thing to someone who works with a dress form all the time, but I don't use Eileen too often. And instead of just pinning the darts, I basted them by hand. Again, it hardly took any time, it was much easier to try on after (no pins to stick me), and I was able to sew over the basting quickly once I saw that it was a good fit.

So that's the story of my first finished dress! I think it's a success, and I would definitely like to use this pattern again. Black or navy? With a tapered skirt instead of A-line? Lots of possibilities!